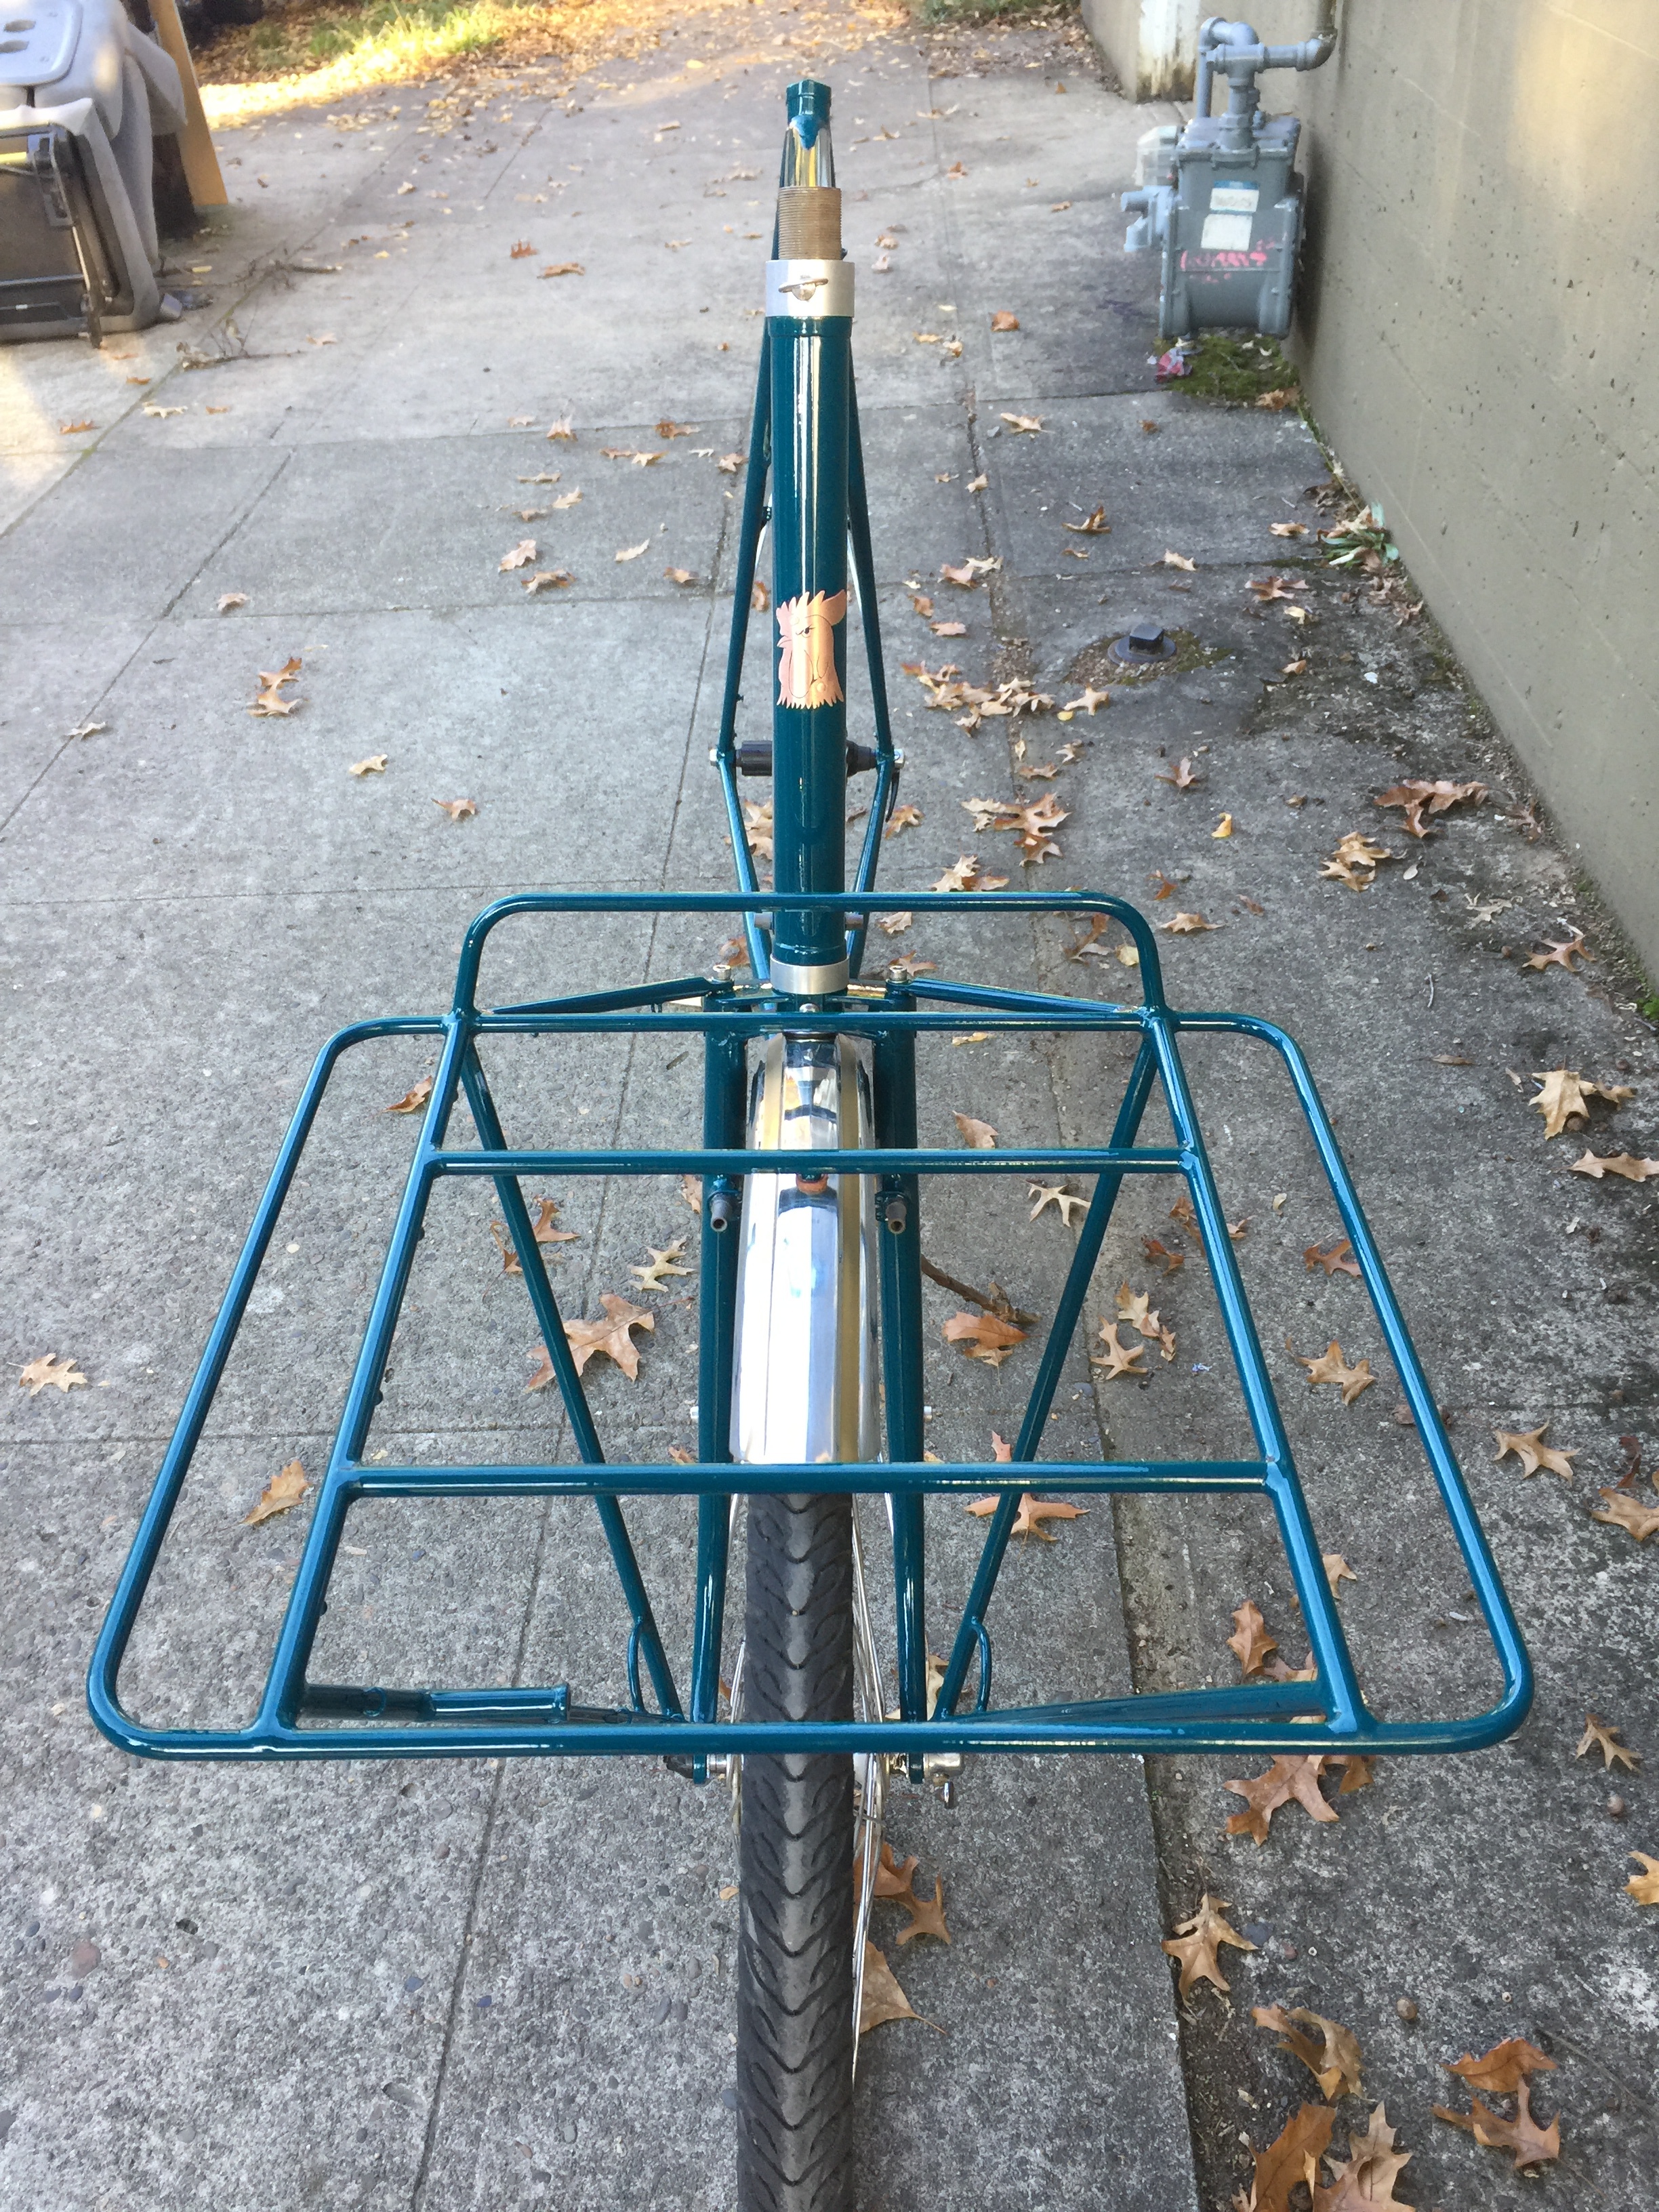
Very tall (biggest one yet, 70cm!!!) and done up in a great shade of blue with a little sparkle to it and gold decals. Full sized porteur rack powder coated to match. Fenders striped with gold as well. And a rooster's head headbadge to top things off. I really love the little touches that bring everything together. Can't wait to see this as a built up bike, it's going to be nice.
bloggy business


60 year old me would be stoked
On a recent project, the customer charged me with making a bike that I would be excited about riding when I was his age. Admittedly he does have a couple of years on me. But we are very very close to riding the same size frame. He had even bought an old bike that I had made for myself back in my Bilenky days, then subsequently sold, which was then sold again. It's now on it's third paint job, and still gets ridden regularly.
What we came up with was an Allroad type bike. Disc brakes and clearances for both 650x47b and 26x2.3" tires (as pictured), with fenders. Thinner gauge, small diameter tubing to keep the ride nice and supple. A PCD MTB crown (RIP) for a little sex appeal. Sunburst yellow powder with matching stem and sparkly purple decals. Throw on mounting points for some Nitto mini-racks and you've got yourself a fun little bike that's ready to go just about anywhere.
So yeah, If 60 year old me just got this bike, I'd be stoked.


Next small batch production run?

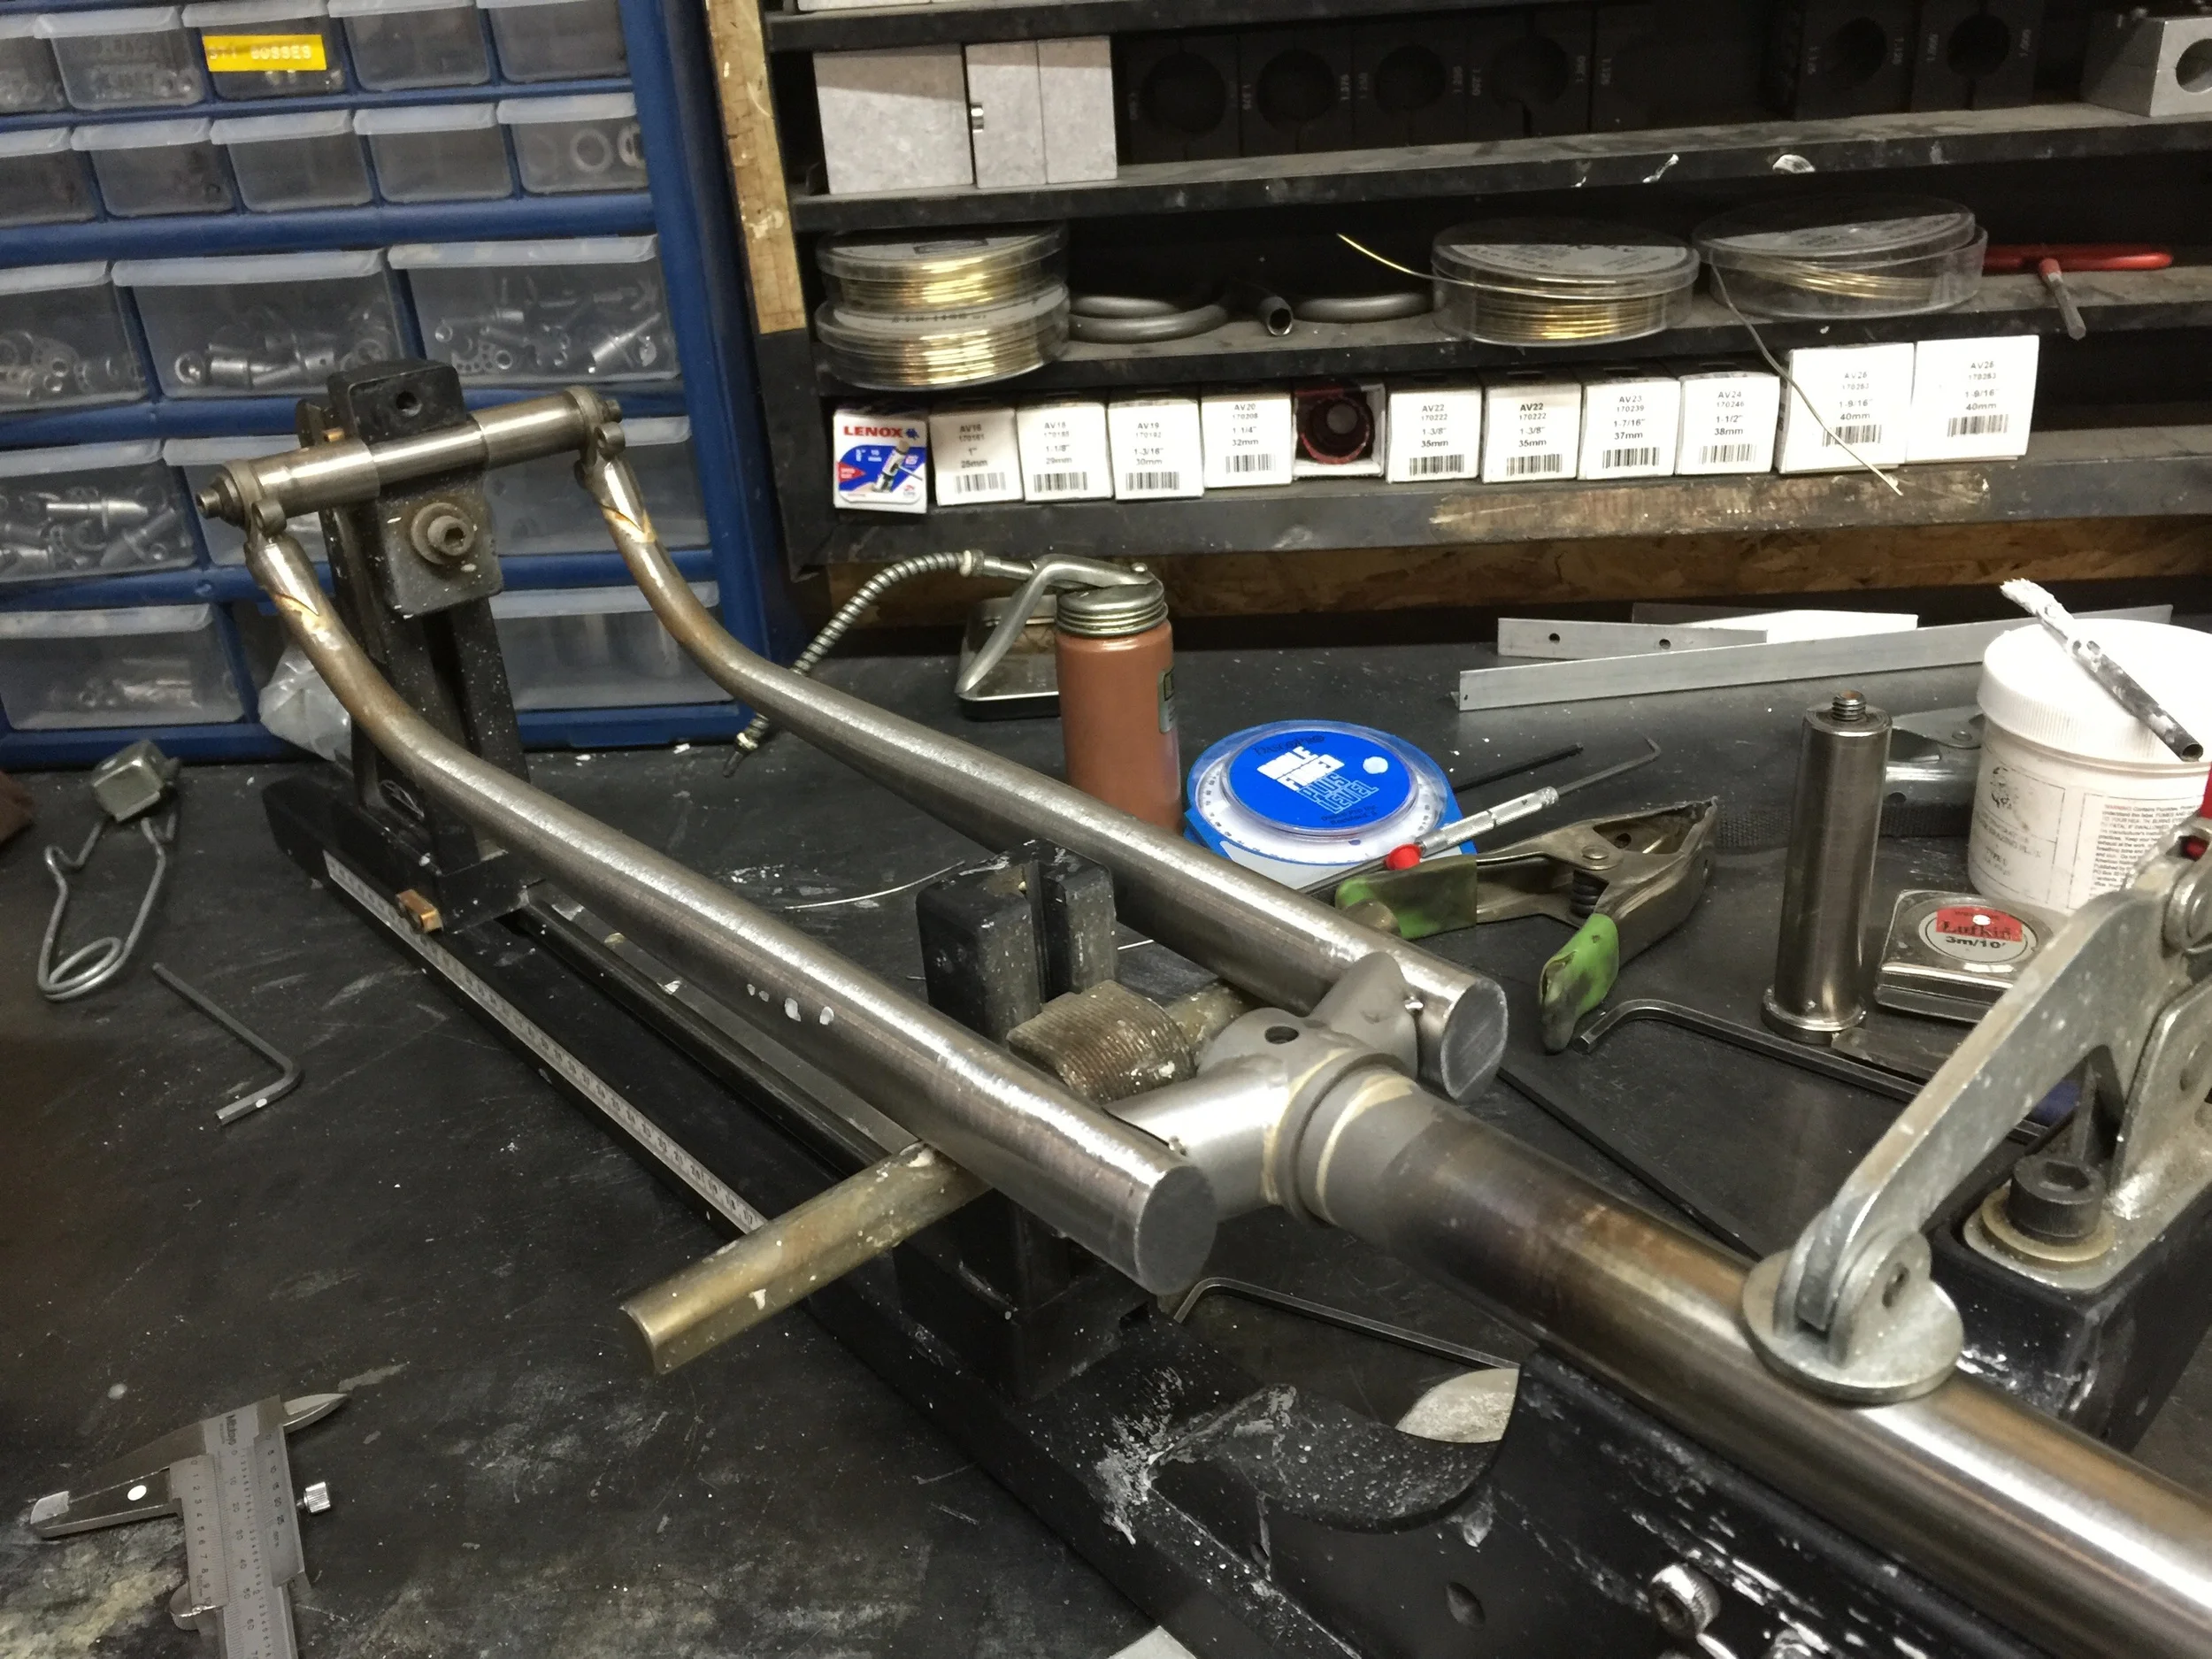
Where it always starts. Drafting up a plan.

TIG welding the down tube to the had tube.

Tacking the chainstays on.

Fitting up the seatstays. Final procedure in the frame fixture. Then moving on to final welding then bridges and braze-ons.
A good portion of the custom bikes that we've been making lately have been some variation or another on the Allroad type of bike. Geometry based on a rando or touring or road bike, but with more voluminous tires (chubby 650b or 26" sizes). For folks looking for a spirited, performance oriented ride that's capable of going places your typical road bike would shiver at thought of.
Currently working on the first of four of this kind of bike in the queue. It's a smaller sized frame with disc brakes, which will allow the use of either 26x2.3" (Rat Trap Pass) or 650x48b (Switchback Hill) tires (with the corresponding wheels of course). No big deal, the wheels have the same outside diameter, just have to make sure we've got enough clearance at the chainstays and fork crown.
Wondering what the interest would be for doing up a small run of these sometime next year. A half dozen or so bikes, all with more limited options in terms of wheel size/steerer/fork/brake type choice. But offered at a lower price point and with a quicker turn around time. (Although still with custom sizing and tube sets tailored to each individual, of course). If any of you out there in internetland have any interest in such a thing, let me know. And if enough folks think they might go for it, we'll make an official announcement sometime soon.
Contact us here: bantambicycles@gmail.com
Off-Road touring, pt. 2


Back from powder and ready to go. This guy got done up in Prismatic Powders Troll Blue (Didn't know trolls where blue, always thought they were green...) with sprayed on decals in plum (trolls' favorite food). We had another special request for a headbadge, this one going with a cat theme.

With capacity for 29x2.00 tires with full fenders, disc brakes, wire ports for generator lights, a cat's head headbadge, and all the braze-ons you'd ever need, this will be one super awesome adventuring machine.
The biggest Bantam


Just wrapped up possibly the largest frameset I've ever worked on. A 70cm porteur bike, with a custom made front rack. (I've built a couple of 69's but this, I believe is the first time that we've breached that mark to 70). The bike looks proportionate to a lot of the other bikes I've made using 650b or 26" wheels, but this little guy is running 700x38c tires and full fenders.
As always, I'm excited to get somebody out there riding on a bike that will fit them properly. I realize how few options there are out there for folks on the outsides of the bell curve of people sizes. But, we here at Bantam Bicycle World Headquarters are happy to help get you on a bike that will fit you well.
More pics coming soon of this one with some color on...
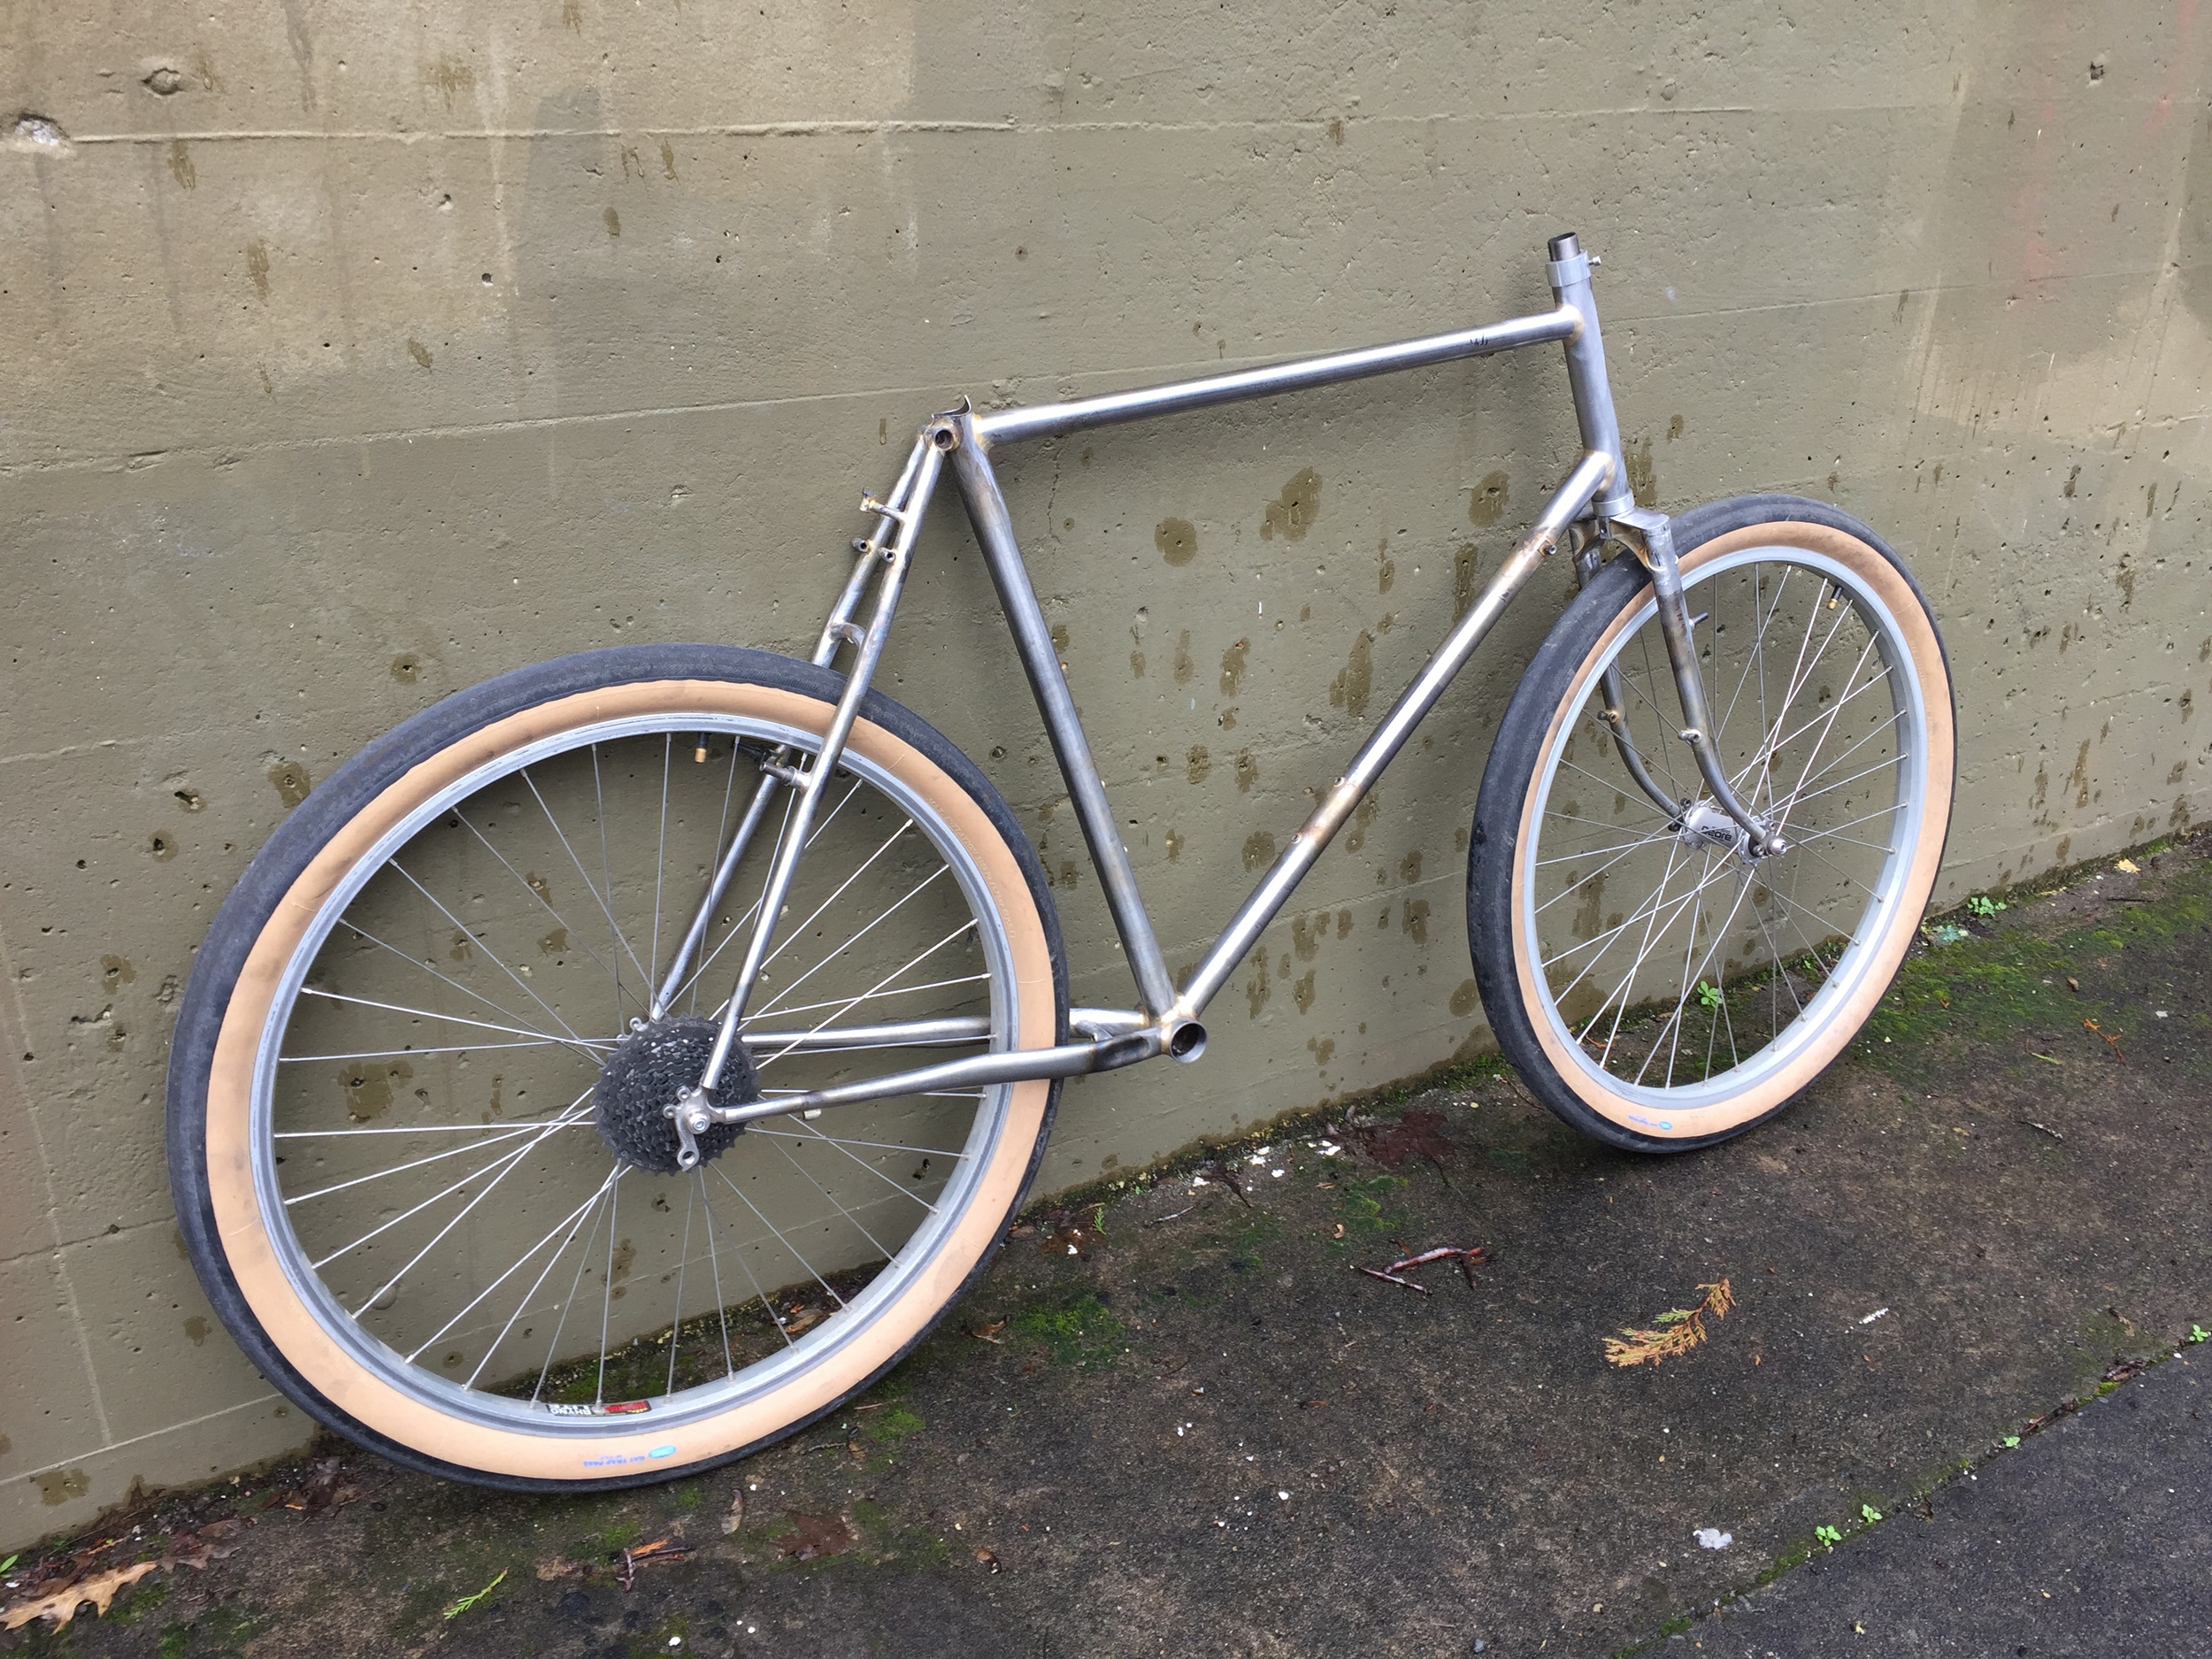
650b Couplered Tourer, Pt. 4


Finally got this one all ready to roll. It's a lugged travel ready 650b touring bike that will pack down into a non-oversized case for easy airline travel. (No excessive baggage fees here!). A nice build kit of tried and true components: Velocity Dyad rims, Schmidt dyno hub, B&M lights, Compass centerpull brakes, racks from Tubus and Compass, SKS fenders (sometimes metal fenders just aren't the right choice, plastic fenders are far easier to pack in the case), Sugino cranks, and a Shimano drivetrain.
A bike like this is designed to take you places in style and comfort. Honestly, I get a little jealous when bikes like this go out the door. It makes me dream of those perfect days on the road, when things are a lot simpler. When all there is to do is camp, eat, ride, and watch the beautiful scenery roll by at 12 miles an hour...
Off-road touring w/bullmoose stem


Wrapped up another project. This one's an off-road capable touring rig. TIG welded and designed to fit 700x50c tires, with disc brakes and a full compliment of braze-ons for all the necessary racks and fenders and bolt on bits. The standout here, though, is the custom made stem. It's a bullmoose style threadless stem matched up to a set of moto handlebars. Just gives everything the right amount of panache to make this bike super awesome.
enduro allroad enduro, pt. 2

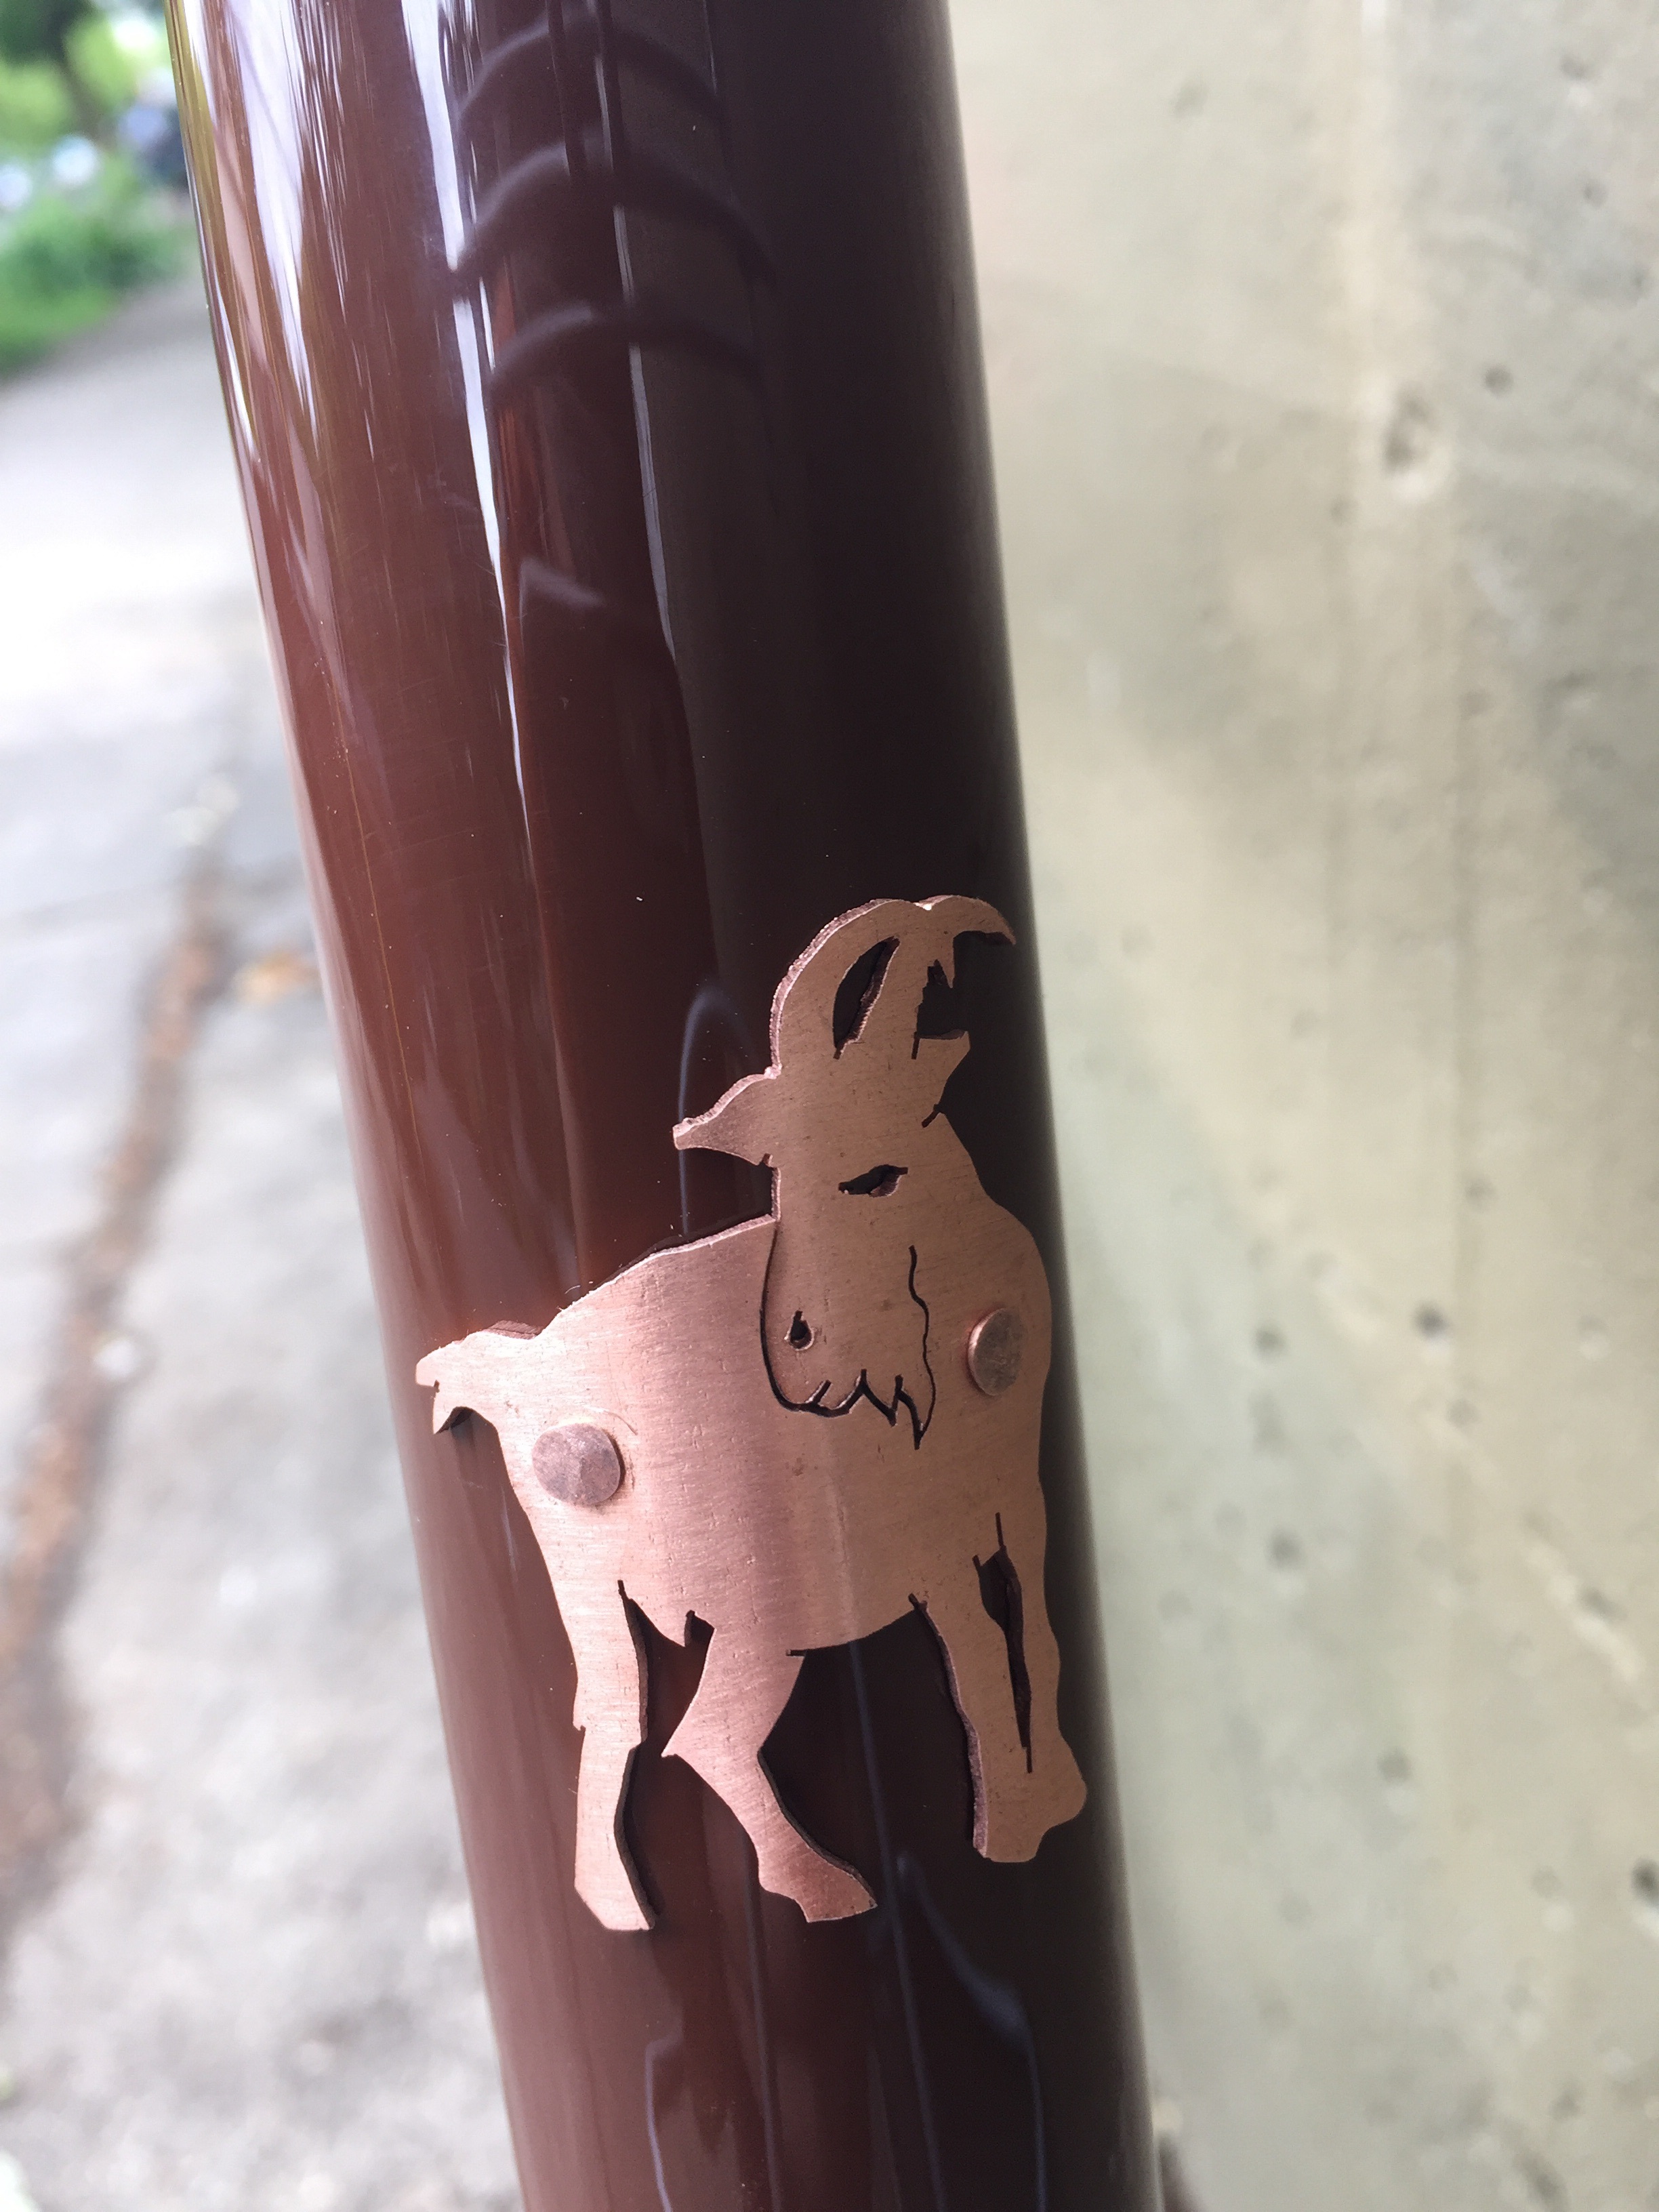


Chocolatey brown with gold decals. The finish on the fillets came out looking spectacular, if I do say so myself. Custom cut goat headbadge, as requested by the customer. Clearances for 27.5x2.25" tires. Thru axles front and rear. Slider dropouts for versatility. And to top it all off, some custom fabricated accessories: stem, decaleur, and front rack with removable lowriders. One sexy sexy looking bike.
But in my humble opinion, none of that is the important part. The important things are that the frameset is well fabricated, it'll fit the customer like a custom tailored suit, and that it is designed to do the things that he wants it to do.
Even with all the different kinds of production bicycles out there these days, there is still a niche for custom built bikes. Bikes that do something a little bit different, fit a little bit better, please the eye just a little more. Bikes that appease the need to stand out from the crowd a little. Bikes that will take you just that much further off the beaten path than anything else out there...
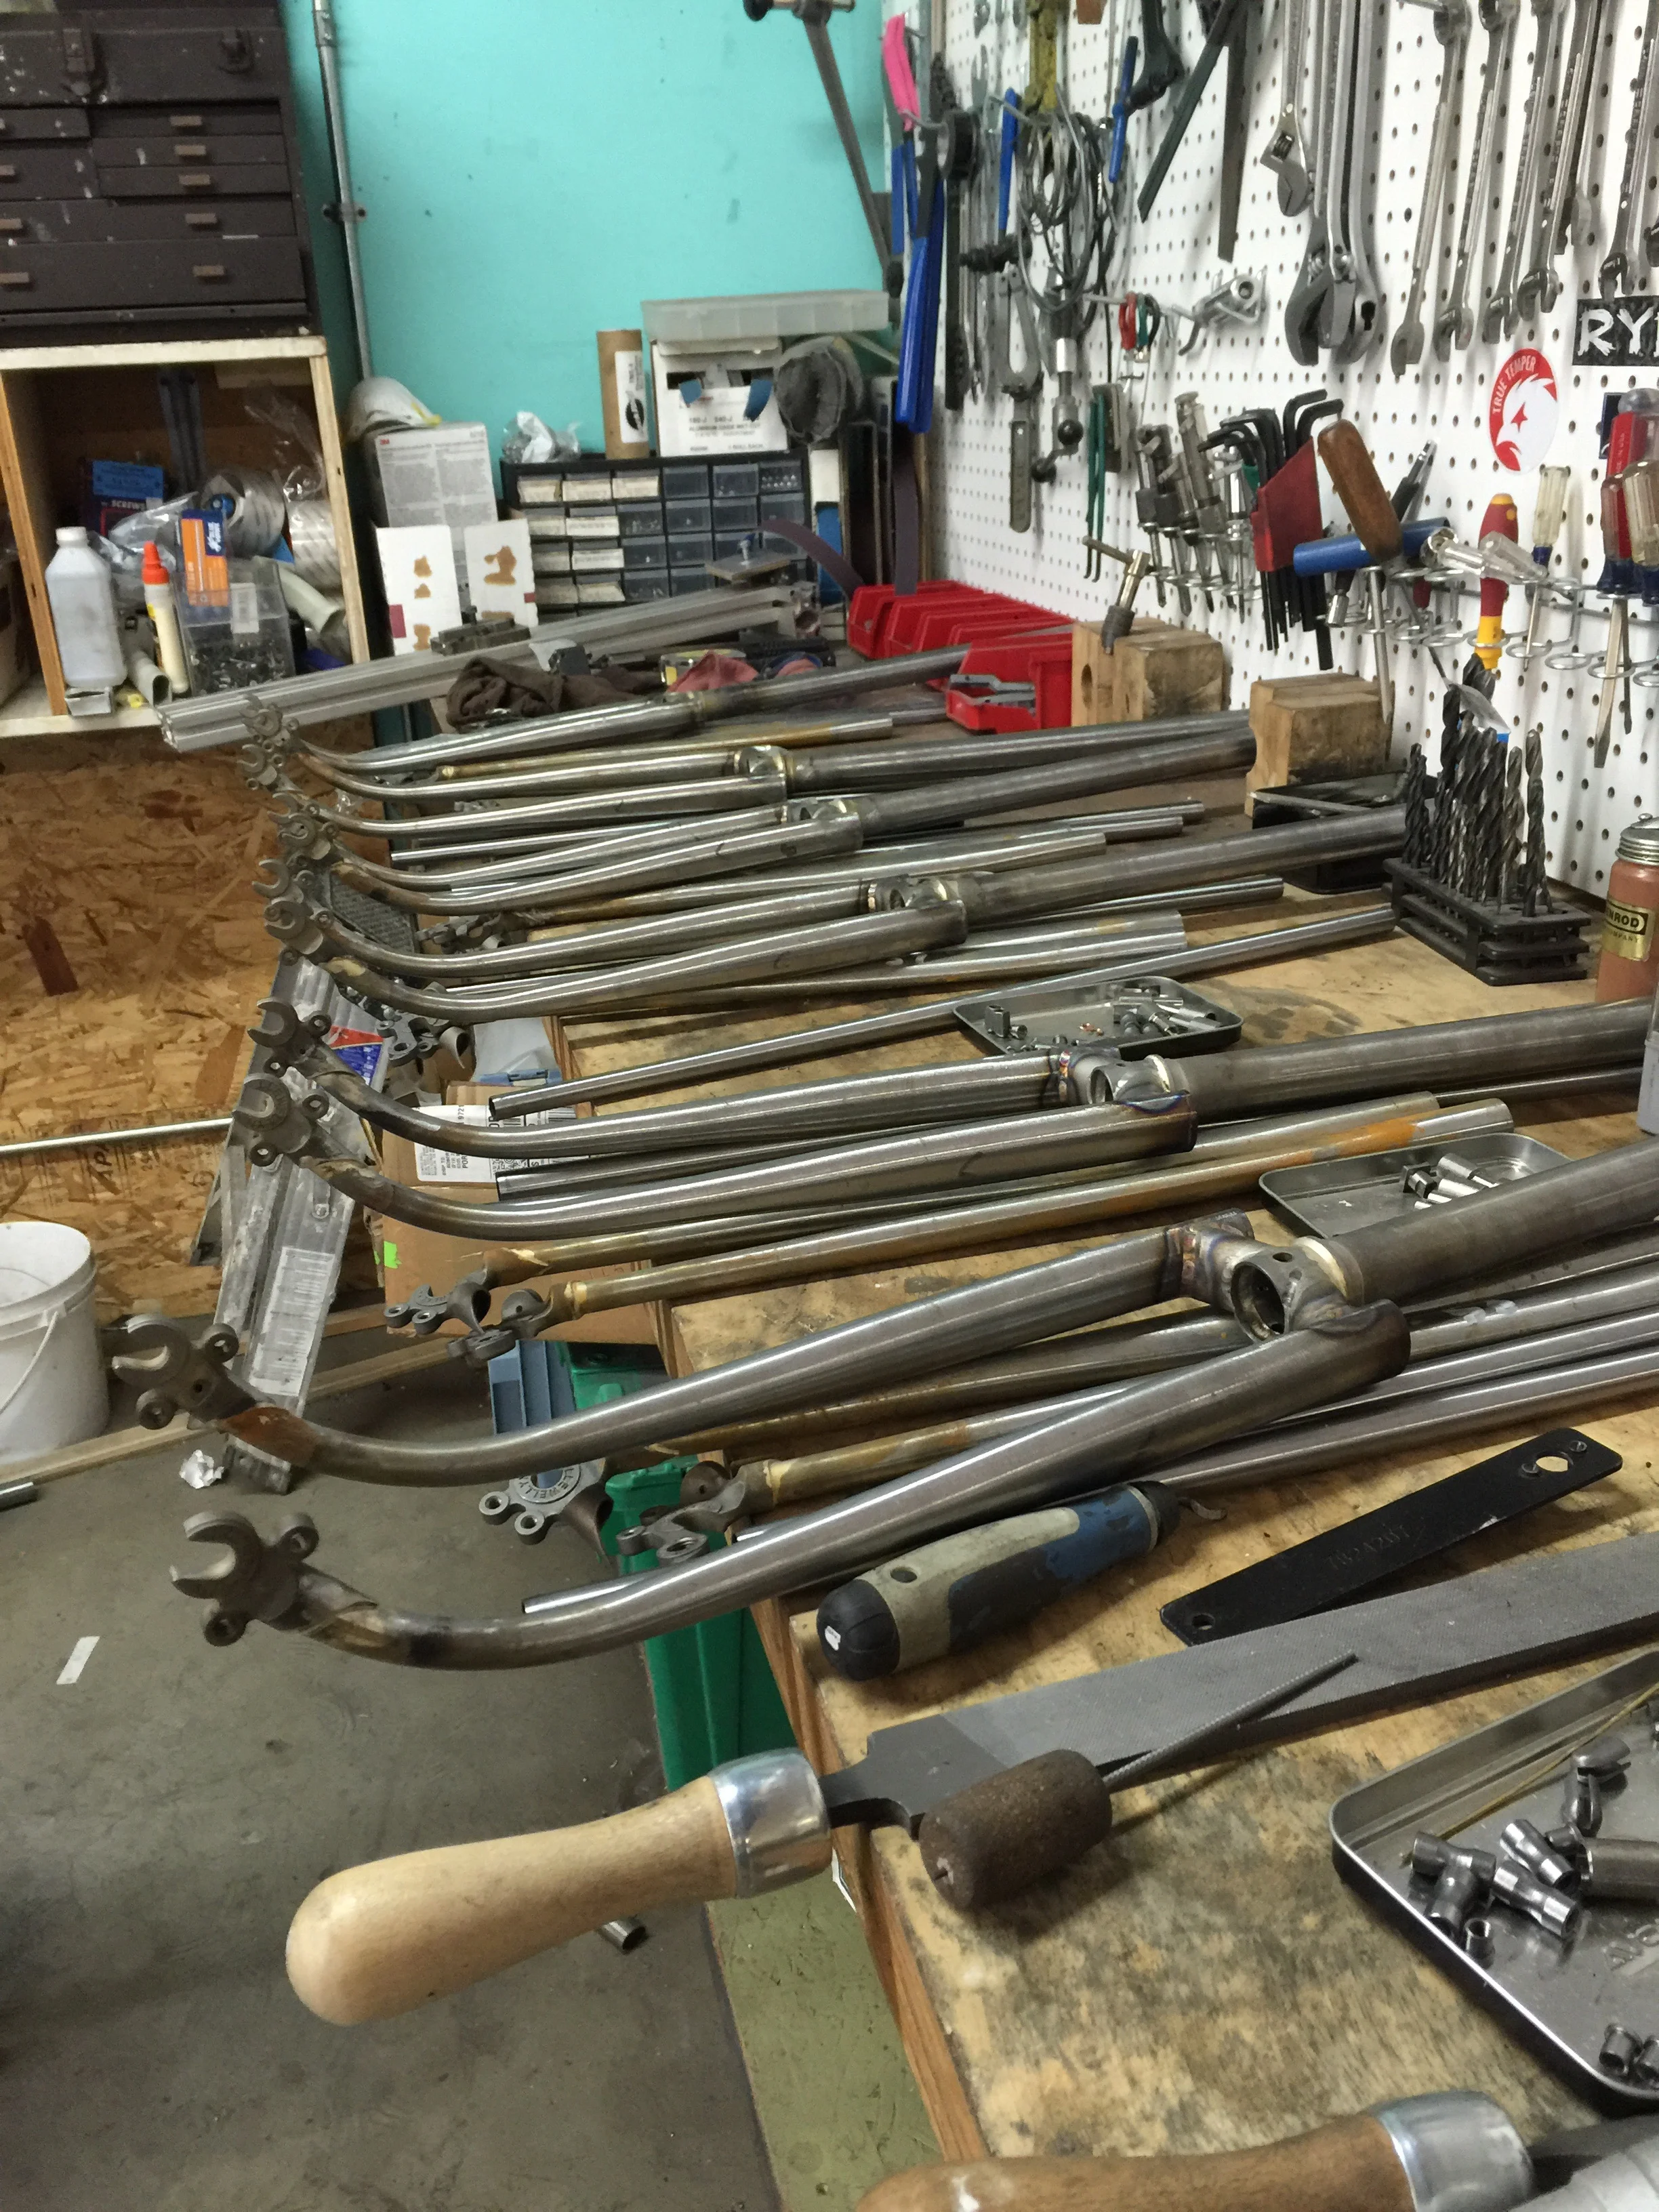
do something, then do it five more times, pt. 2


Keeping at it. Nearly done at this point. Only have to double check the alignment on the forks. And then we can put them to bed. (Or send them off to the powder coater as it may be).


Funny to think that my production this month has been more than what I did in my first year open for business. Not that I wasn't putting in the same number of hours, but I've become so much more efficient in my process. Better tooling and less figuring shit out will do that for you.
Be posting some pics of the completed frames soon.
do something, then do it five more times


Sorry for lack of posting recently. We've been engaged in doing some production work for the fine folks at Ocean Air Cycles. Whipping out a small batch of Ramblers for them. It's been kind of fun, figuring out the most efficient way to do things. So far so good in not having any major screw-ups. (The problem with messing something up in production work is, obviously, when you make a mistake you usually make it multiple times before you realize what happened. And then you have to fix it multiple times. I've got stories...). I'll be posting more pics of this as the project progresses.
making broken stuff fixed
That don't look right
I do love me a repair project every once in a while. Quick and easy. Get somebody's bike back on the road.
Doubling up the dummy axles to make sure it stays straight
Weld it

Grind down the faces to surface and it's good to go
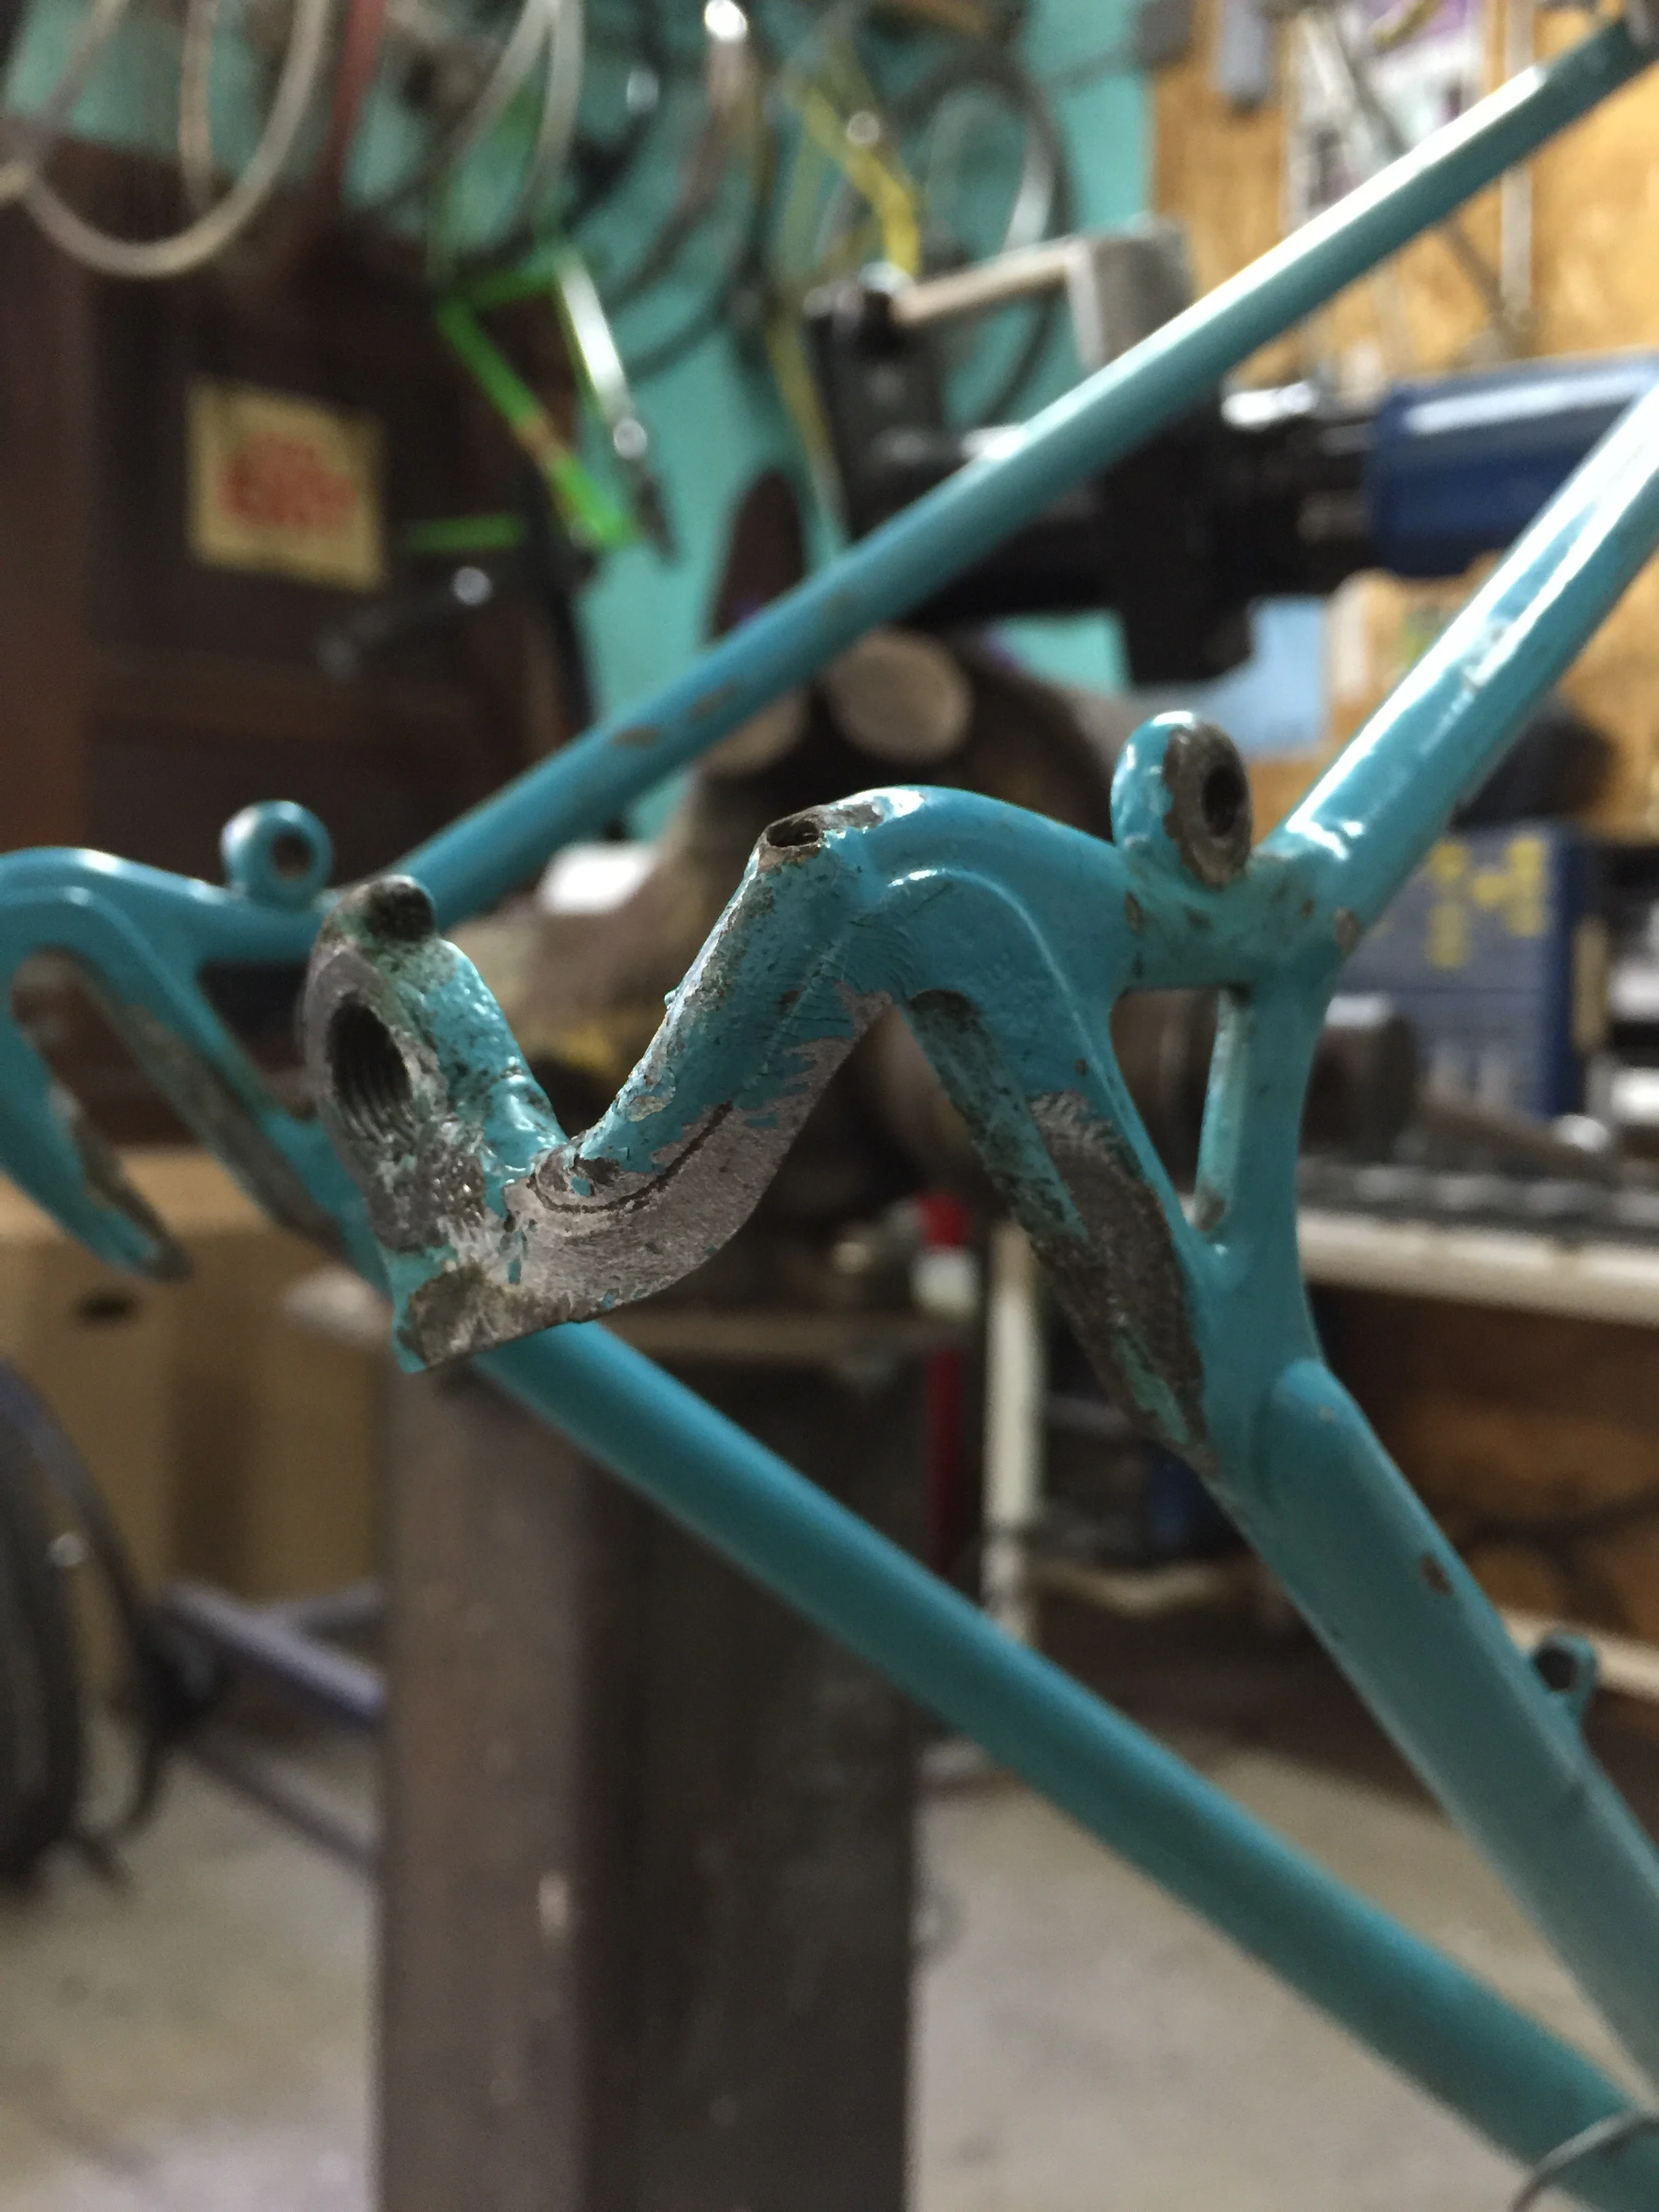
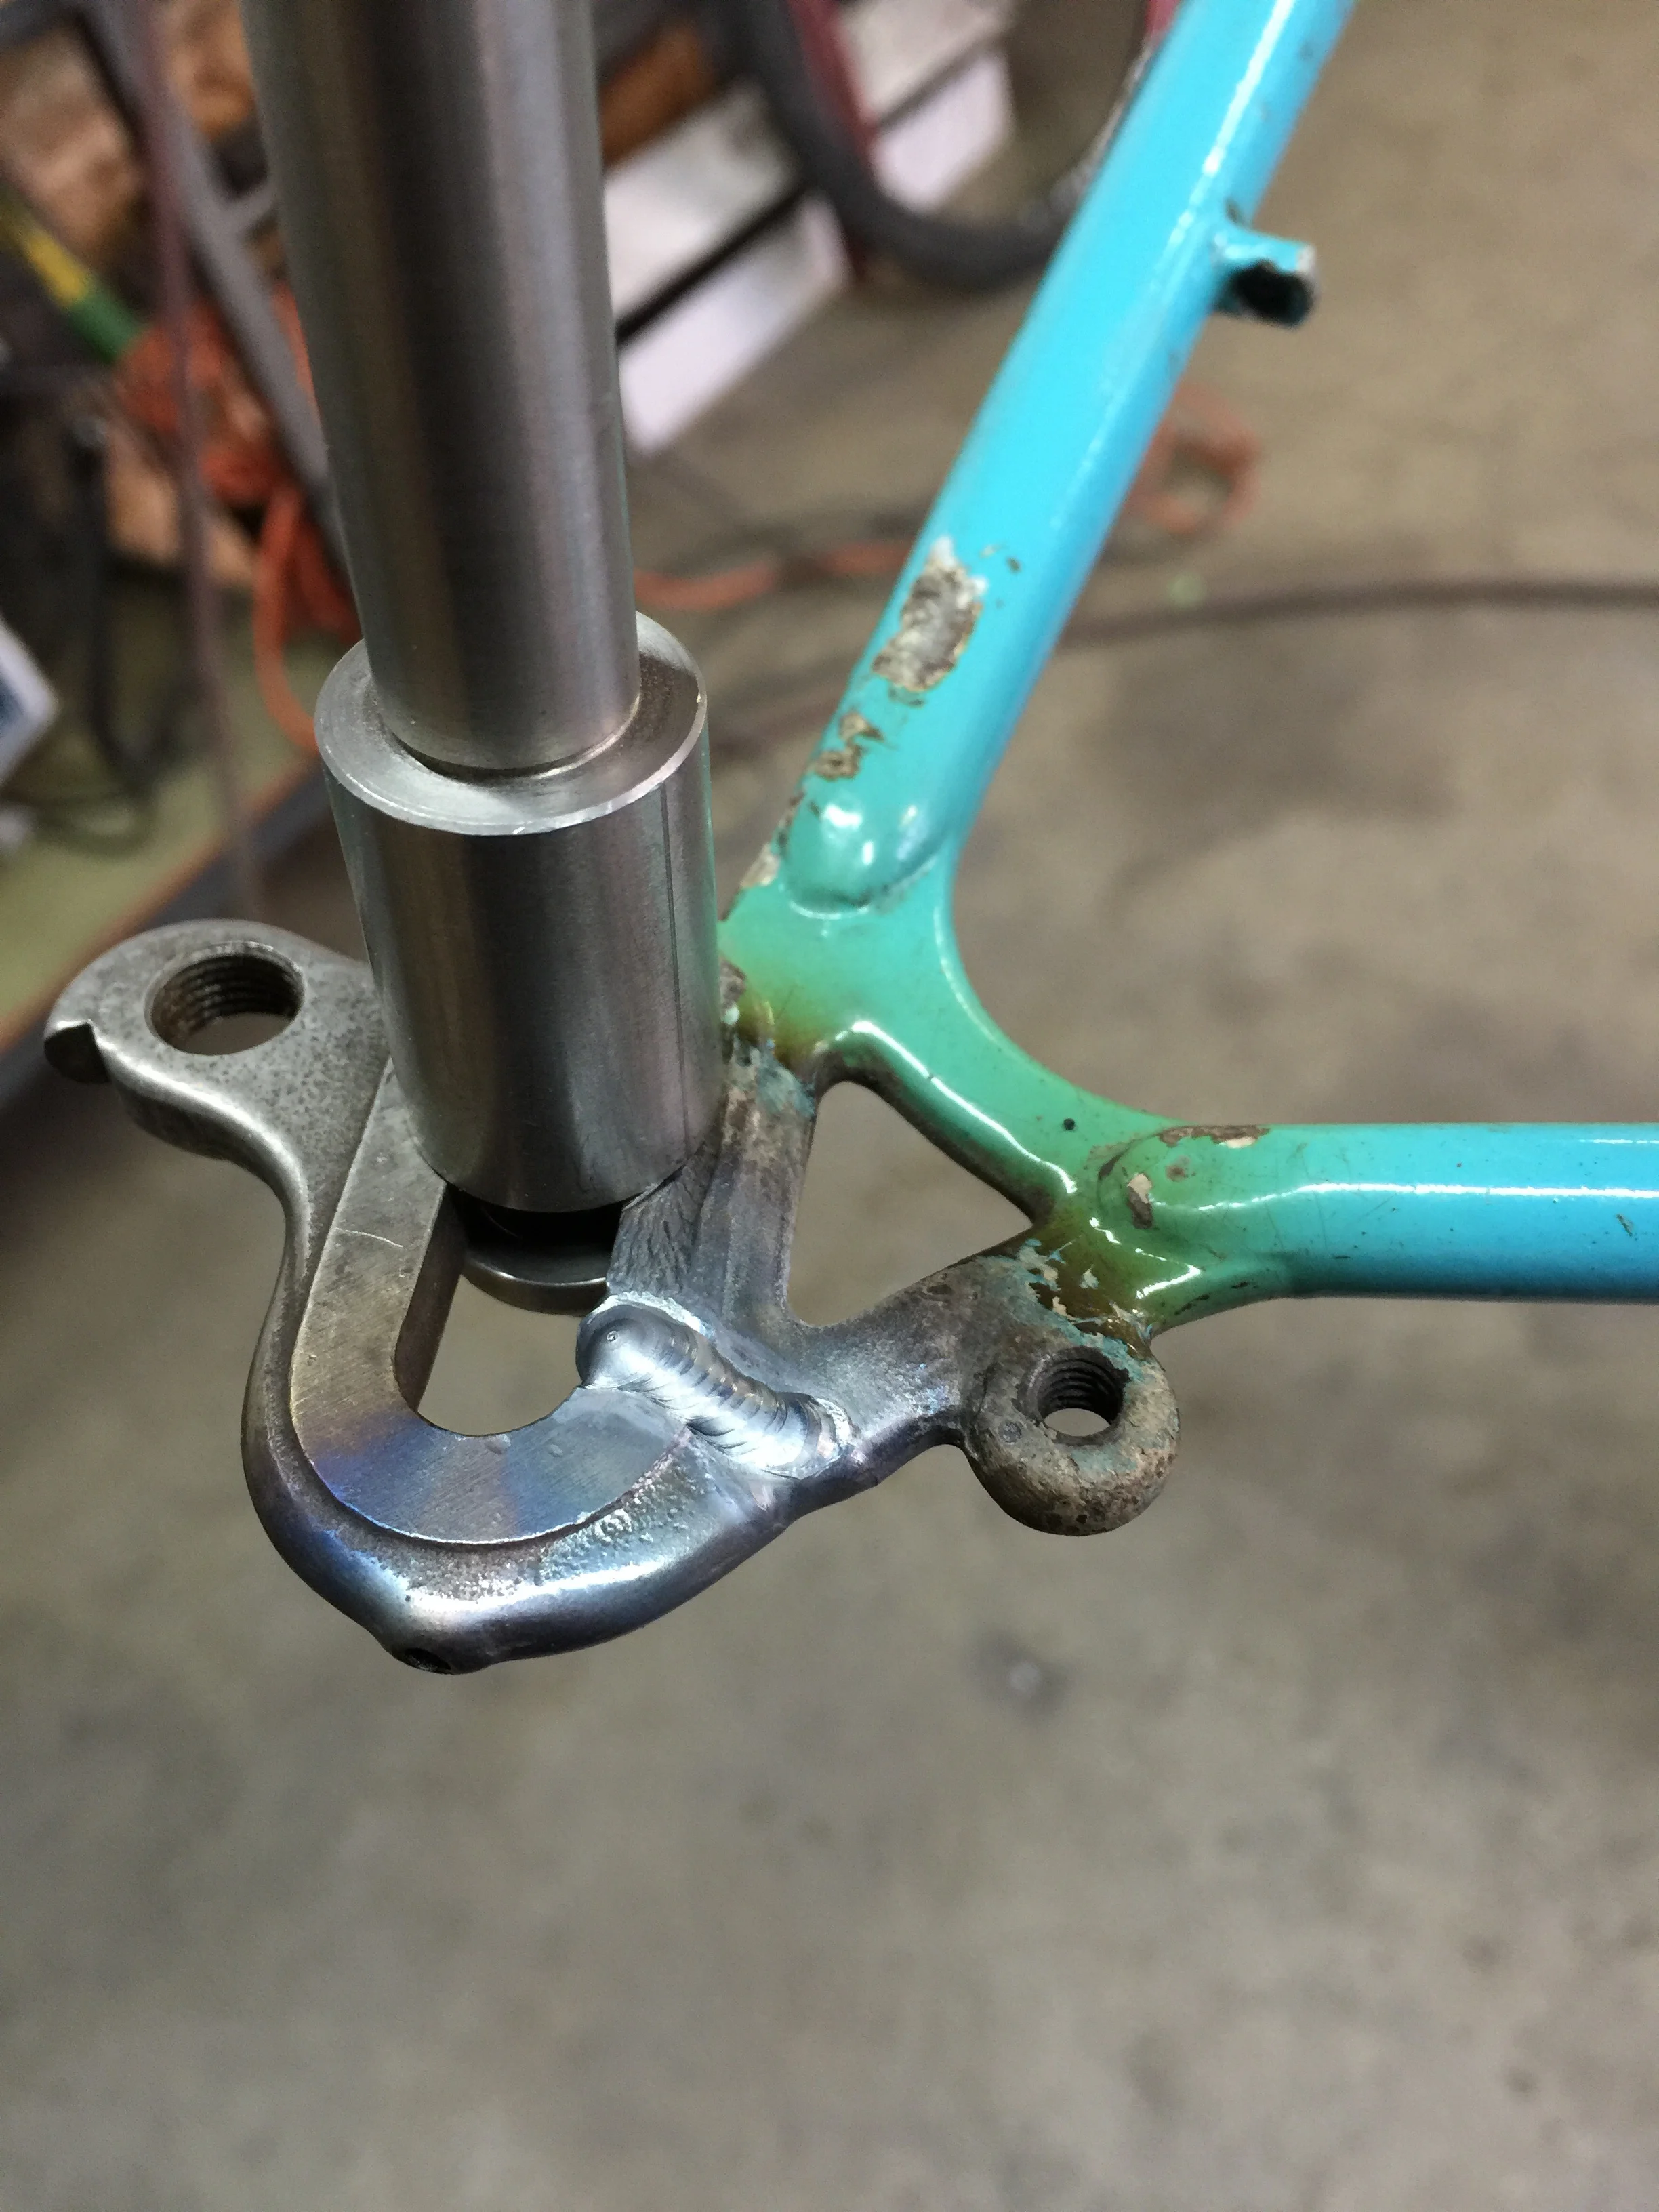
Fixed the rear DO on an old Condor road bike frame today. Cut the Campy dropout above where he damage was and welded on half of a new old stock one. A little debatable whether this is preferable to replacing the entire dropout. Pluses and minuses to both ways. With only welding on part of the dropout, you are reducing the amount of heat going into the stays significantly (they only got lukewarm). But you are creating a week point on the dropout where the weld is. Just a question of where you want it to break next time IMO.
Went with the weld method for this one, quick and dirty style. It's a much quicker fix and saved the customer a couple of bucks. Whatever the case, the bike is up and running and the customer has his trusty steed back. And that's the important part.
one week to go...

Only one week left to get in on Adventurebike round two. $1350 will get you a custom fitted off-road touring/bikepacking frameset, which may be the only "production" bike out there right now with bikepacking specific geometry. We have tweaked the geometry of this bike just so to optimize it for riding it off road while loaded. It'll still handle peachy fine when unloaded, but when loaded up with a couple days worth of camping gear and snacks it will just shine like no other bike out there can.
Just a couple more spots open. Look here for more details.
double down

Happy customers are great even when it's just a repair job. Surly Steamroller with two top tubes in full effect. Now all it needs is another Huffy top tube pad...
"rad"
The part that makes my job worth it:
"Finally got out for a legitimate inaugural ride, up the Klickitat River Trail. Enough mud to mostly obscure the logo, although the downpour in the last mile back to the car washed some of it off. The bike is outstanding, thanks again for building it!"
Still taking deposits for Adventurebike round two. $1350 for frame and fork, custom sized, any color you want it to be. Look here for more info.

side projects

Occasionally we get requests to make things that are not bicycle frames. Most of the time they are somewhat bicycle related projects.
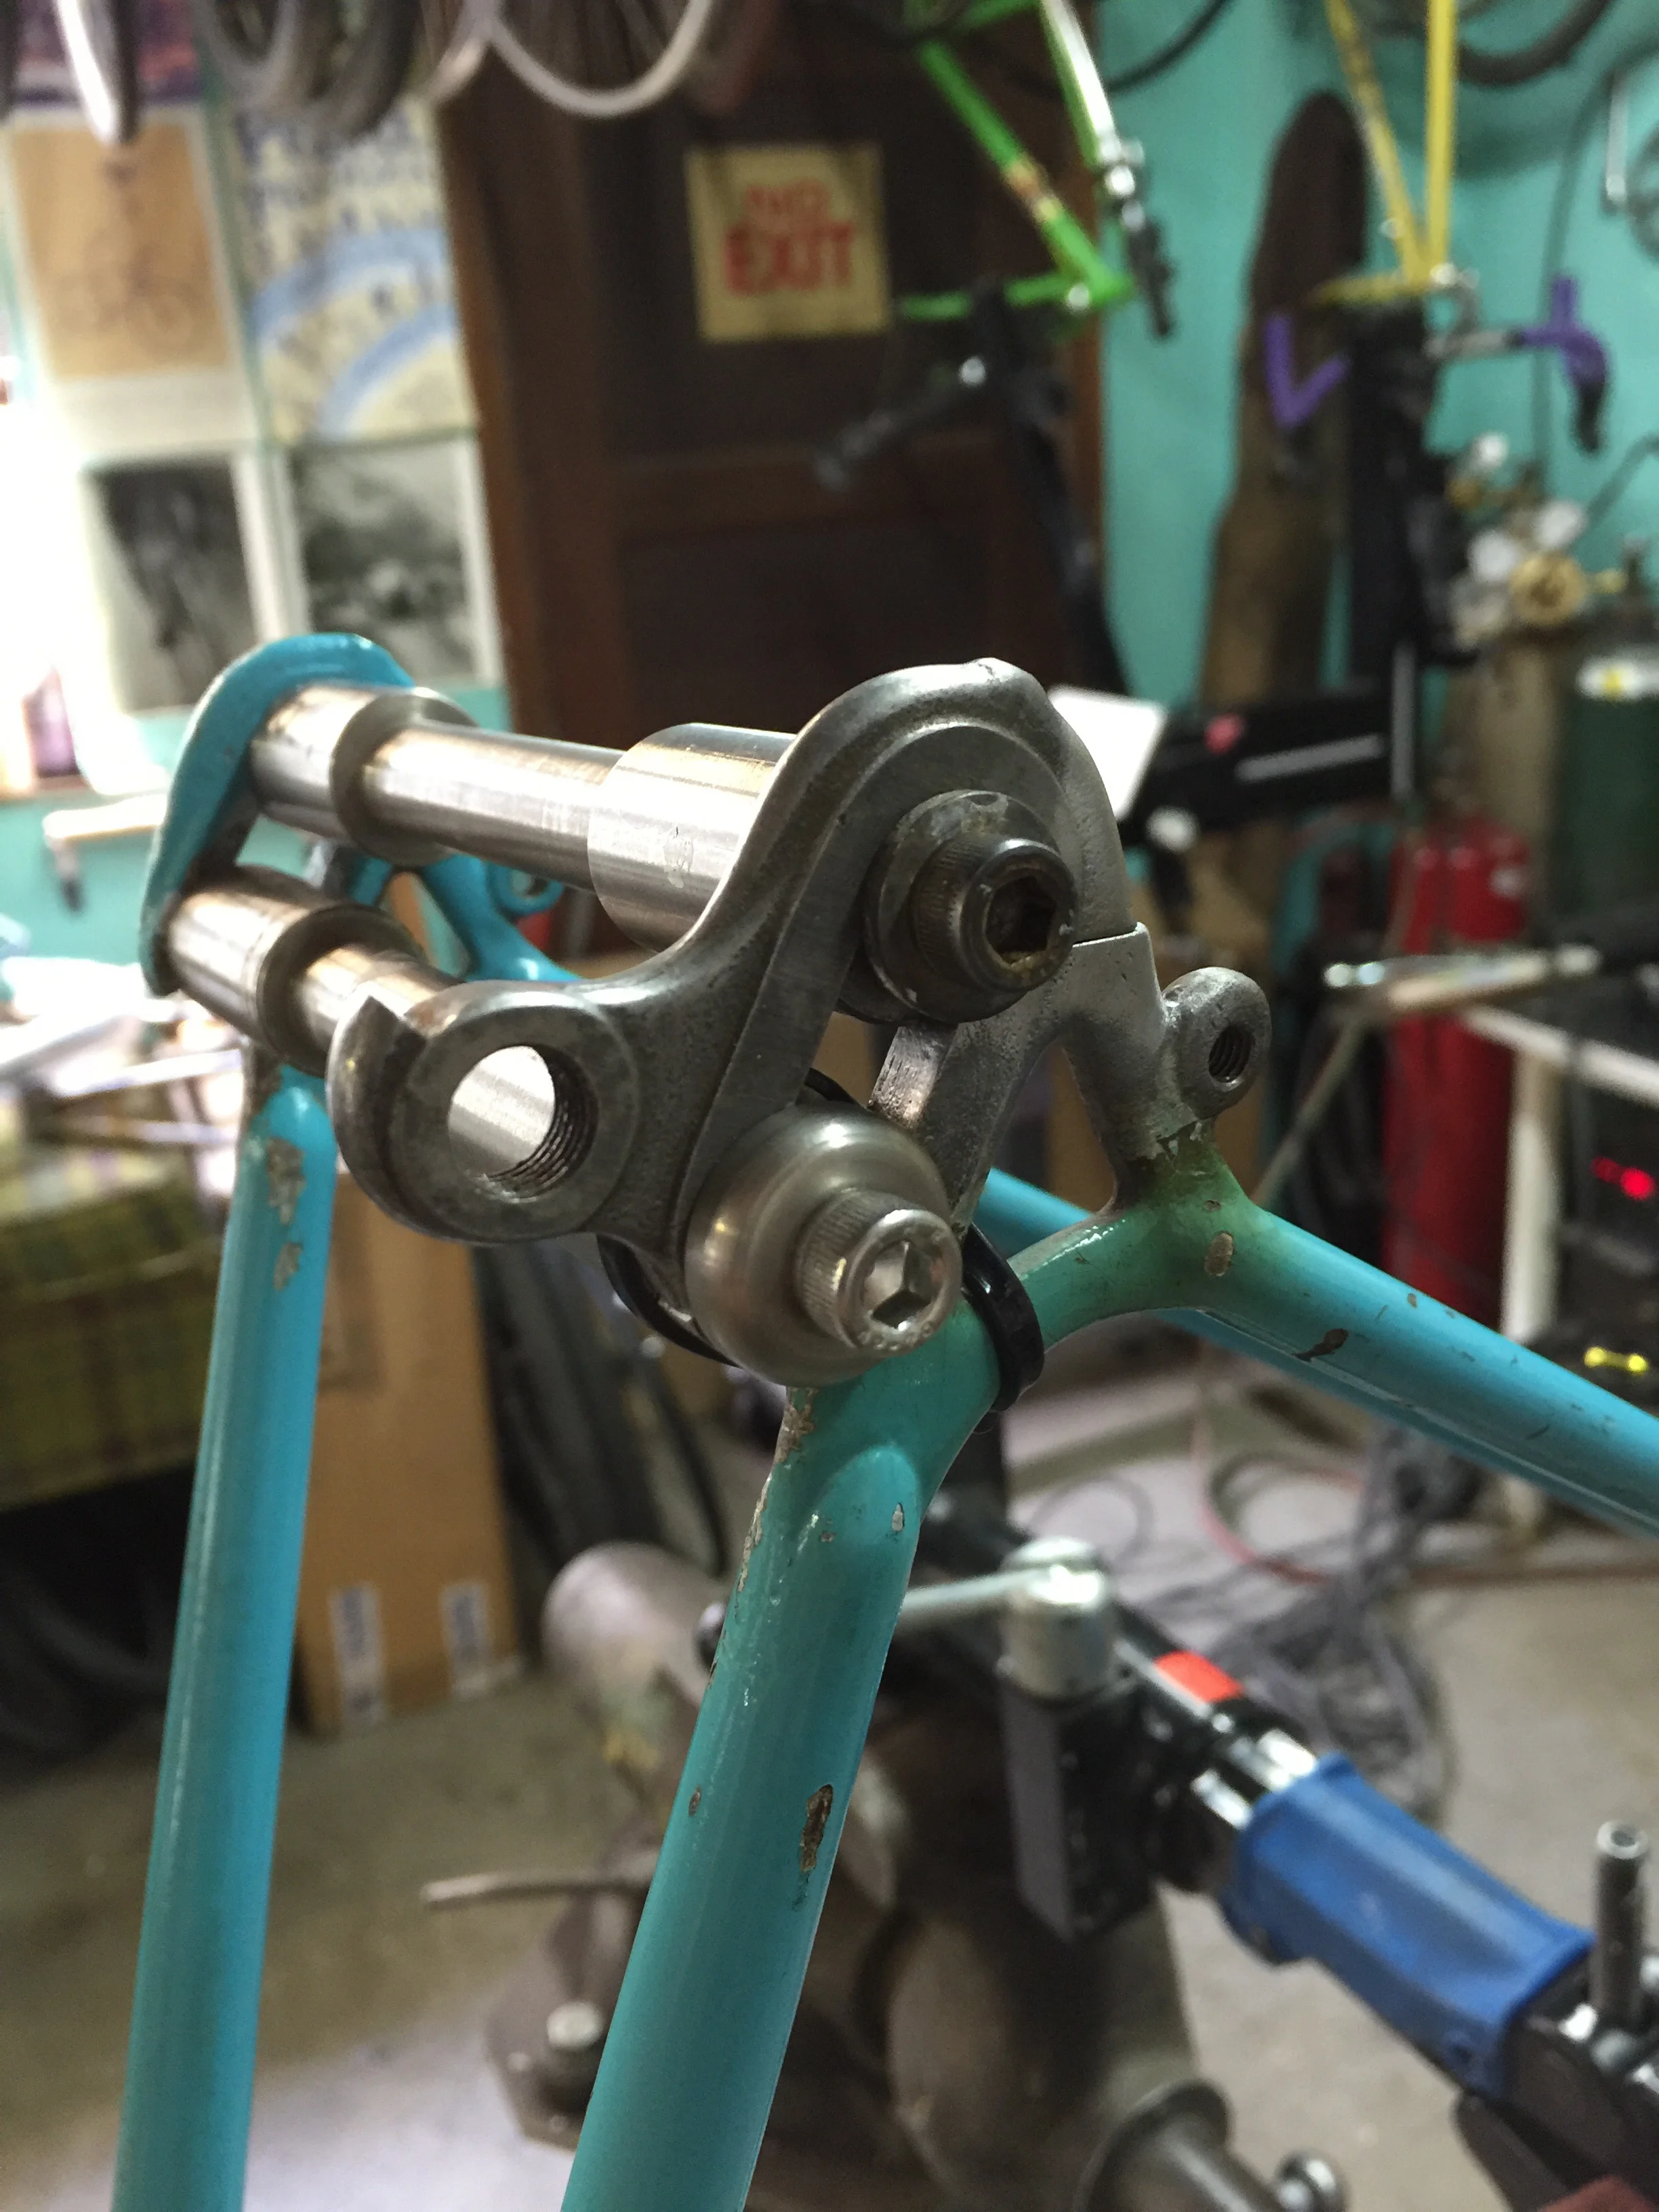
We recently knocked out a batch of dummy headsets for the fine folks at Framebuilder Supply here in Portland. A really simple, but super useful framebuilding tool. Also one that is near-on impossible to make if you don't have a lathe at your disposal. They are for sale here, in 1" and 1.125".
We're more than happy to help out some friends build their business and help other framebuilders practice their craft. Also happy to help anyone out with their general machining/metal fabrication needs. Feel free to contact us with any questions or to get a quote on a job.
packing instructions
One of the biggest questions folks usually have when talking about getting their bikes fitted with S&S couplers is how does it all fit in the case. Well we recently packed up a rather large (61cm) rando bike into it's case. The entire bike with front rack, 700c wheels, and full fenders went in without much fuss. Didn't even have to remove the fork from the frame. You will need a few basic tools for the job, but they will all easily fit in the case with the bike: An S&S pedal wrench/hook spanner tool, a set of allen keys and possibly a box wrench or two depending on what kind of hardware your bike uses, and a mini pump. All stuff you would probably carry with you on a long ride anyway.
So we're putting this up here as reference material (and even breaking from our usually format, so the pictures will be larger...). Usually there's one best way to pack up a bike. You follow the same sequence each time and it will always work. The first couple of times that you do it, it will be kind of a pain in the ass (just like learning any new thing). But after you do it a few times it'll be a lot easier, you probably wouldn't even need to refer to the pics.
We here at Bantam Bicyles are happy to share this information. We are also happy to put couplers into you bike, whether it be a new custom bike from us or retrofitting your existing bike. We love opening up the entire world as a possible place to travel with and on your bicycle.

Front end first.

Then all the bits and bobs: pedals, skewers, tools, bottle cages, front rack, etc...

Rear wheel, cassette side down, tire deflated. Don't forget to remove the skewers, won't work otherwise.

The rear half next. On larger bikes you may have to remove the rear derailleur.

Tuck in the saddle and seat post.

Carefully wiggle in the handlebars.

Fenders next.
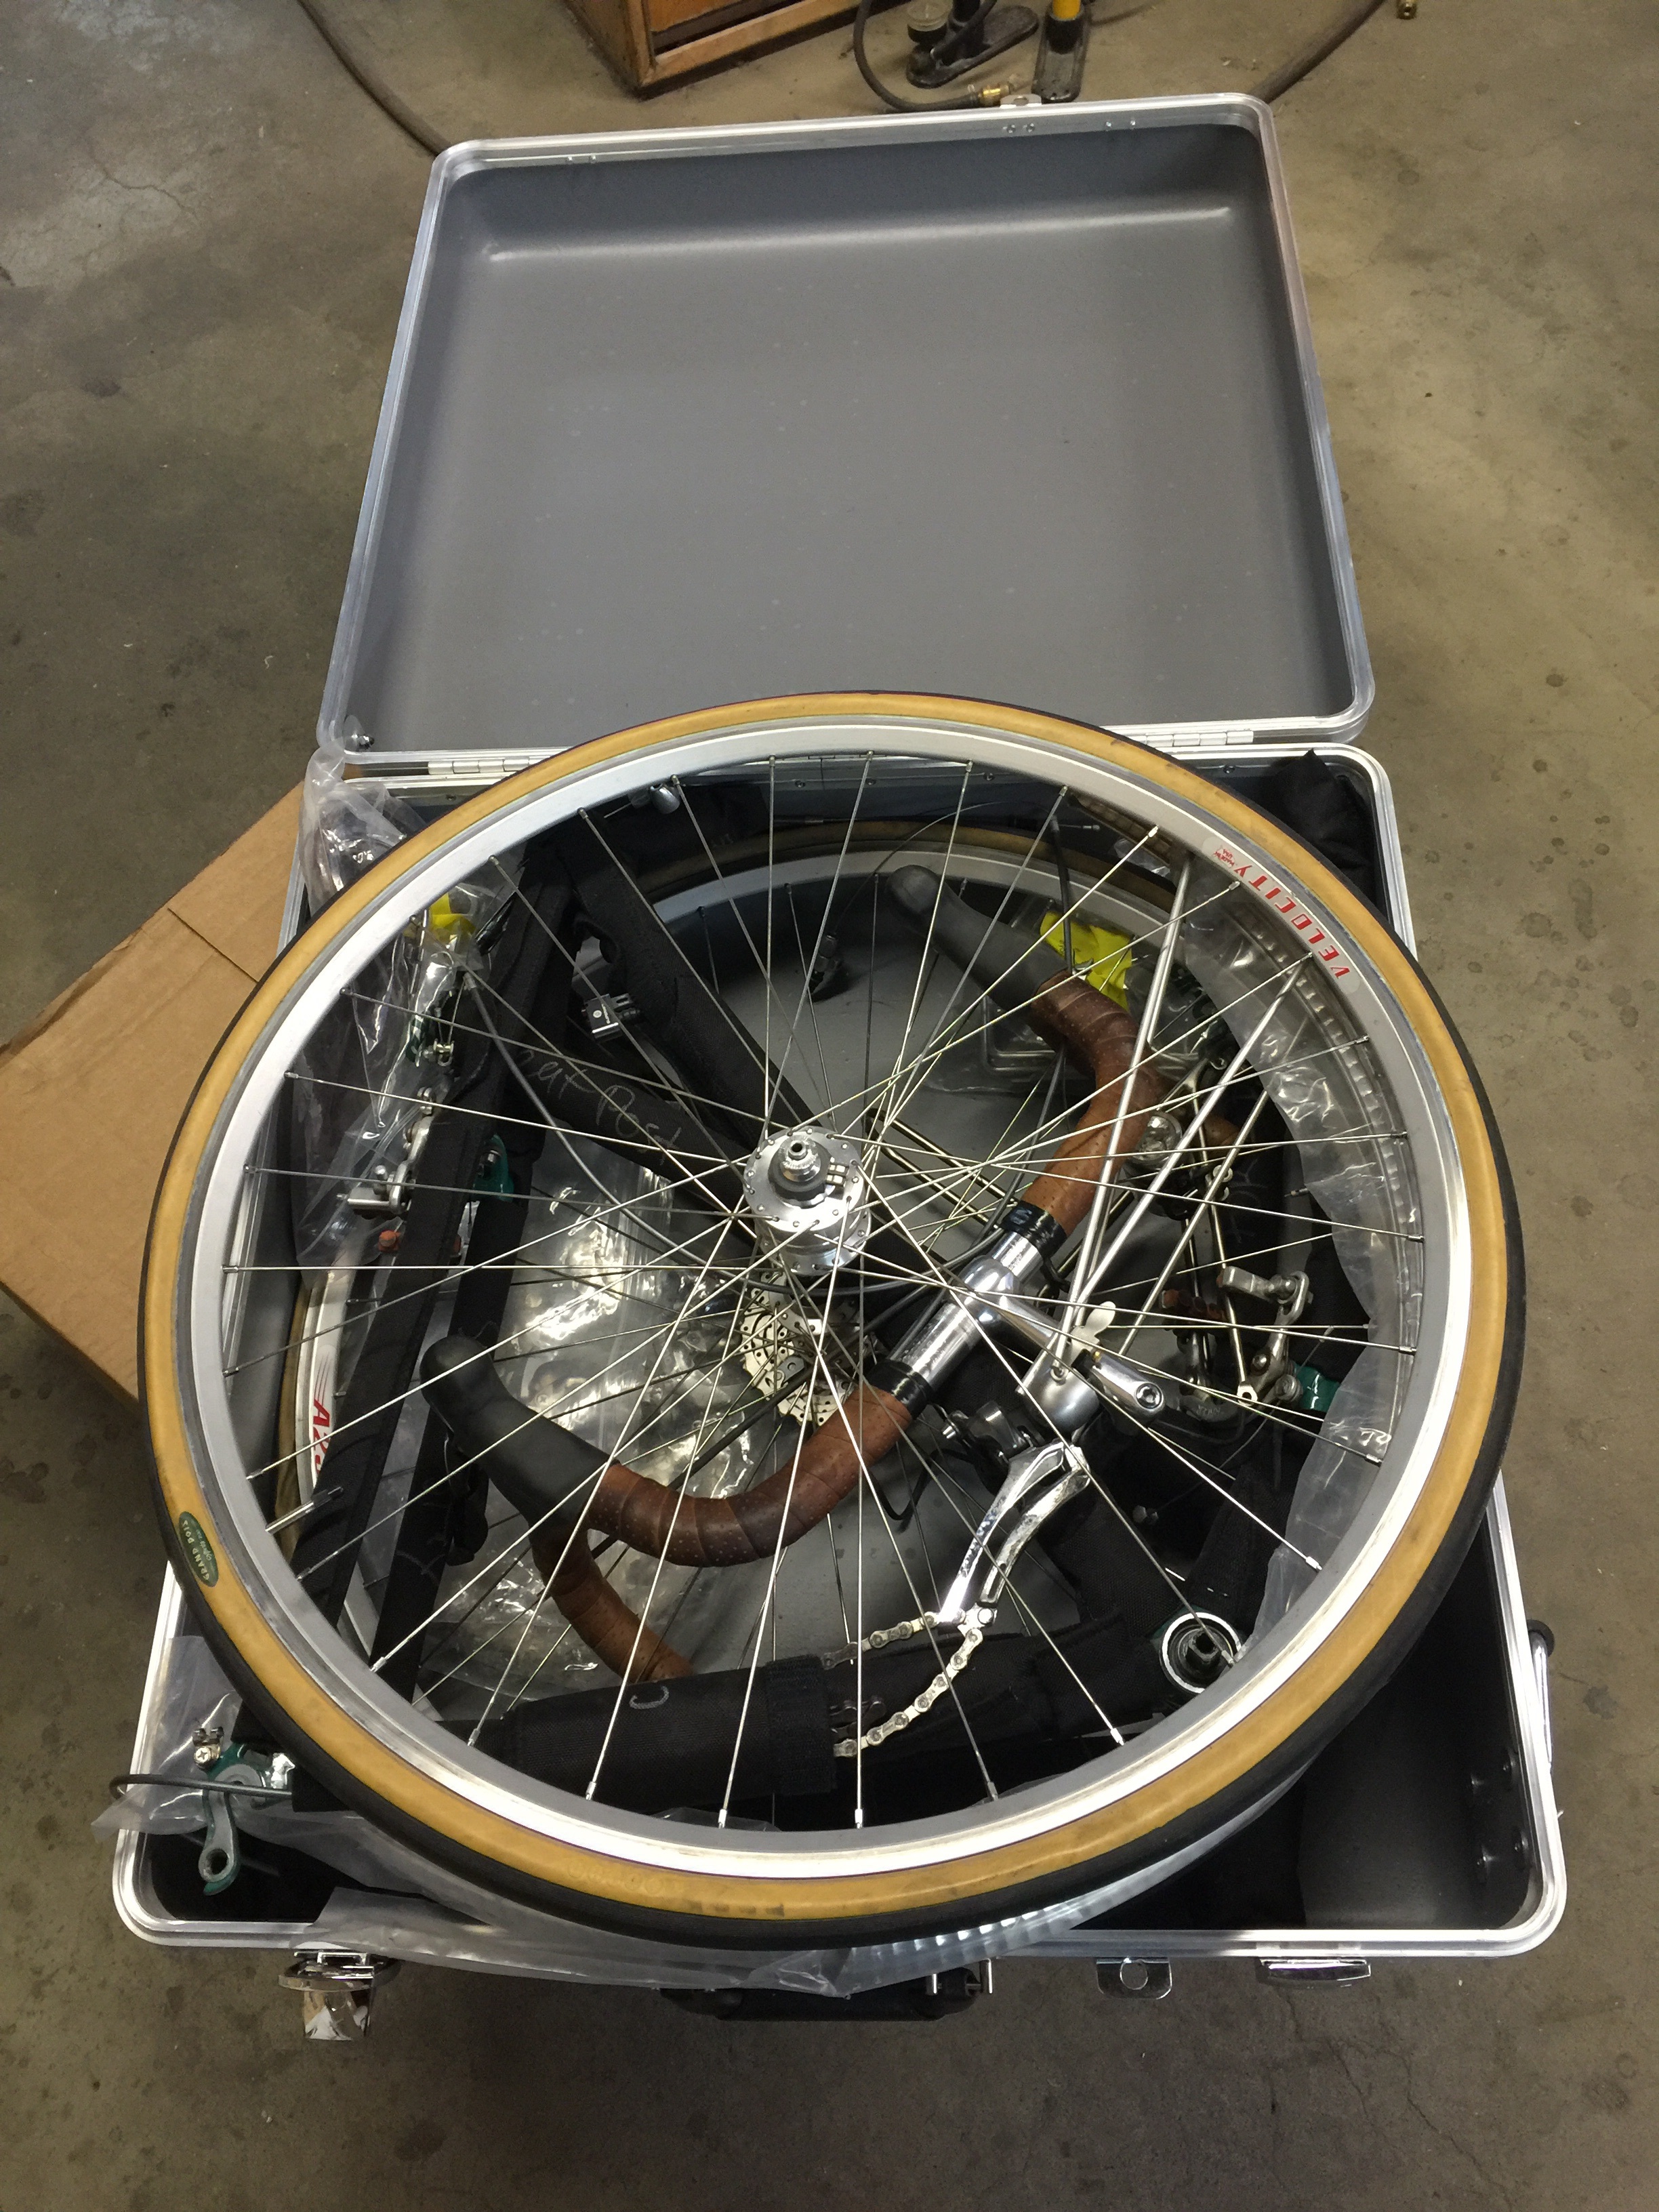
And lastly the rear wheel. It usually easier to insert the wheel into the lid of the case before closing it. It's kind of tight with with everything in there, but don't worry it'll fit.

Close it up and you're ready to travel!!!
the shop has been quiet...
Me and the fam went on a well needed vacation last week. All my tools have been sitting around the shop unloved and unused for a good 8 days or so. Probably would have brought the lathe with, but couldn't afford the oversized/overweight baggage fees on a 3500lb. machine tool...
But rest assured, we're back at it. The lathe is making spinny things, the mill is mitering tubes, the torch is combusting gases and melting metal...
The ordering period for the next Adventurebike run is still open. There are still a few spots left, but they are filling up. More info here. Until we start building those, we'll be keeping ourselves busy with a bunch of custom orders. Expect be seeing a lot of nice bikes rolling out the door in the next couple of months.
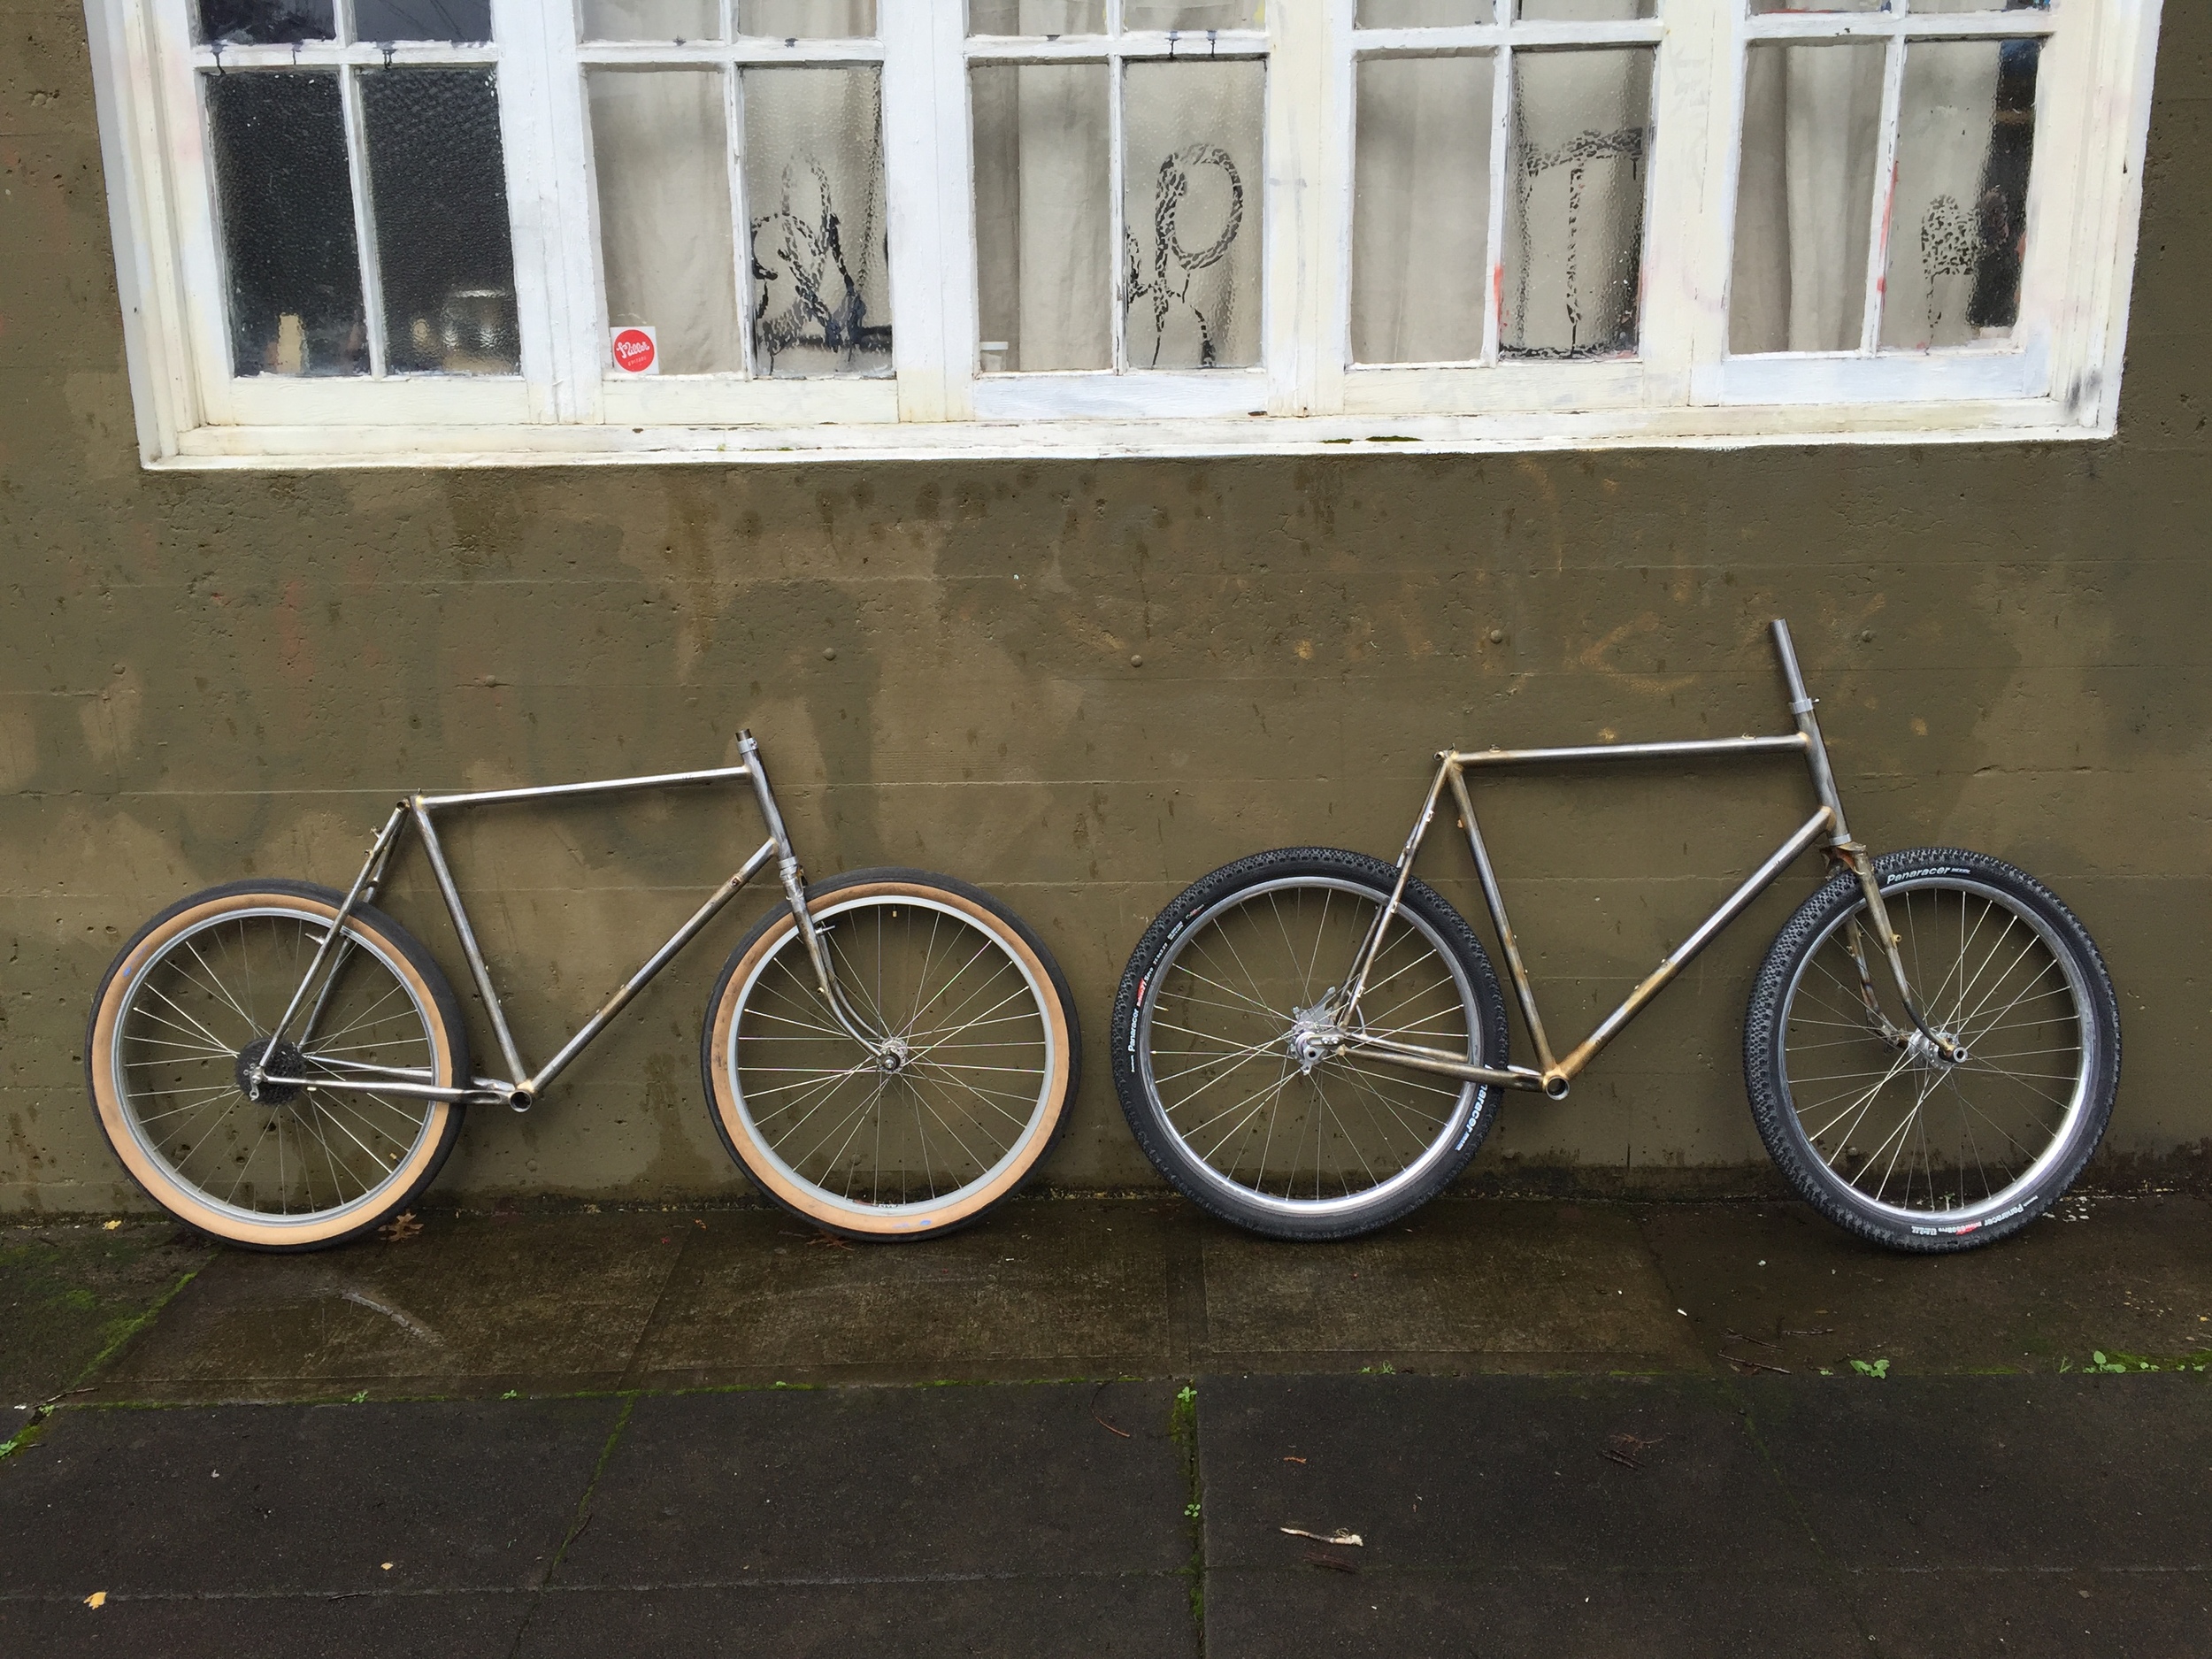
enduro allroad/allroad enduro
A couple of similar frames nearing completion this week. Both of them are drop bar wide tire gravel road exploration machines. Nearly identical geometries. Both fillet brazed. Same load carrying style (handlebar bags all around, with the option of adding on panniers for overnight trips). Both running a PCD MTB fork crowns on custom built forks.
There are definitely some differences here though...
The frame on the right side in the photo is getting some fairly traditional components. Cantilever brakes, 1" threaded headset, an 8spd drivetrain, 26" wheels, and regular ol' quick release axles. Tried and true parts that will definitely get you where you are going and get you back home.
The one on the left will get you to all the same places, here and there and back to your house again, but with a more modern panache. Disc brakes, 142x12mm thru axle rear hub, 100x15mm thru axle front, threadless headset, 650b wheels, and PMW slider dropouts (I believe the customer's going to start out running it with a 2x10 drivetrain, but the possibilities are nearly endless here...).
I guess the point is that we here at Bantam Bicycle Works World Headquarters do not subscribe to any particular philosophy in terms of how you should part out your bike. And we are more than willing to build your frameset in such a way that it will work with whichever components you choose. It is your bike at the end of the day and it should be what you want.